Learning how to make croissants and pain au chocolat at home definitely doesn’t need to feel daunting or scary. While this croissant recipe is a three-day commitment, it’s so very worth it, and that time is mostly made up of hands-off time.
Within this post you can learn how to make croissant dough (which doubles up as pain au chocolat dough, too), how to roll a croissant, filling options, and storing options – including how to freeze them. As I said, this recipe is time-intensive, which is probably why it’s taken me this long to get around to making them. However, I can’t tell you how worth it it is when you cut into perfectly airy, crispy buttery homemade croissants.
How To Make Croissants
There are a few steps involved in making homemade croissants including preparing the dough, choosing/preparing the filling, filling and rolling the croissant (or pain au chocolat), and baking the breakfasts.
Filling Options
Whether you want plain breakfast croissants, a chocolate croissant recipe, or to experiment – there are lots of options for filling your homemade croissant. Here are just a few options for fillings
Chocolate filled croissant (pain au chocolat) Homemade Nutella filling Za’atar spice filling Your favorite jam Cinnamon sugar
You can also flavor the dough with a variety of interesting options: green tea, birthday sprinkles, almond croissants etc. I’ll be keeping things simple here though, with plain dough for this croissant recipe.
The Recipe How-To
What’s needed
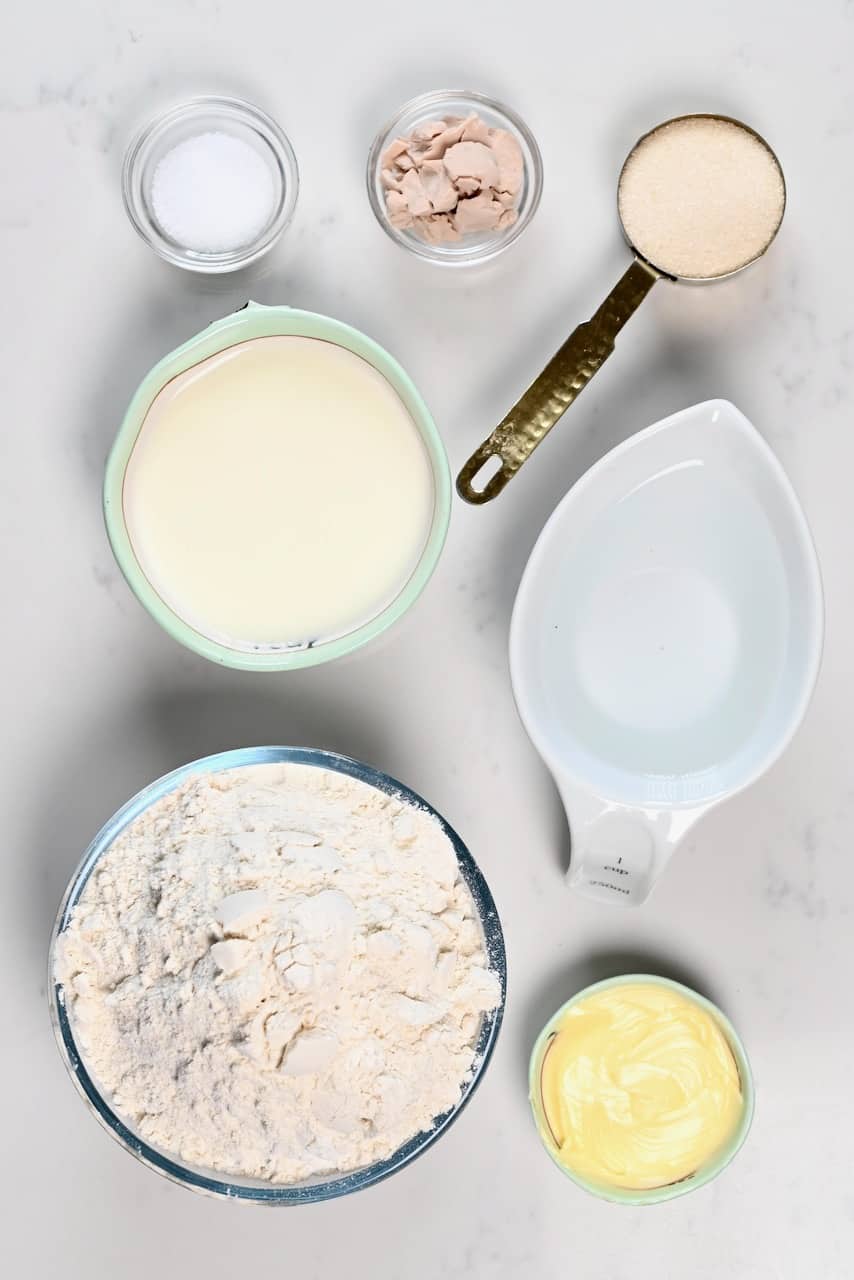
The Dough: Flour, brown sugar, salt, yeast, milk, water, butter – these are the dough ingredients. butter – needed for the lamination process egg and lemon – for the egg wash Fillings: za’atar spice, dark chocolate, or your favorite jam or homemade Nutella
The Steps
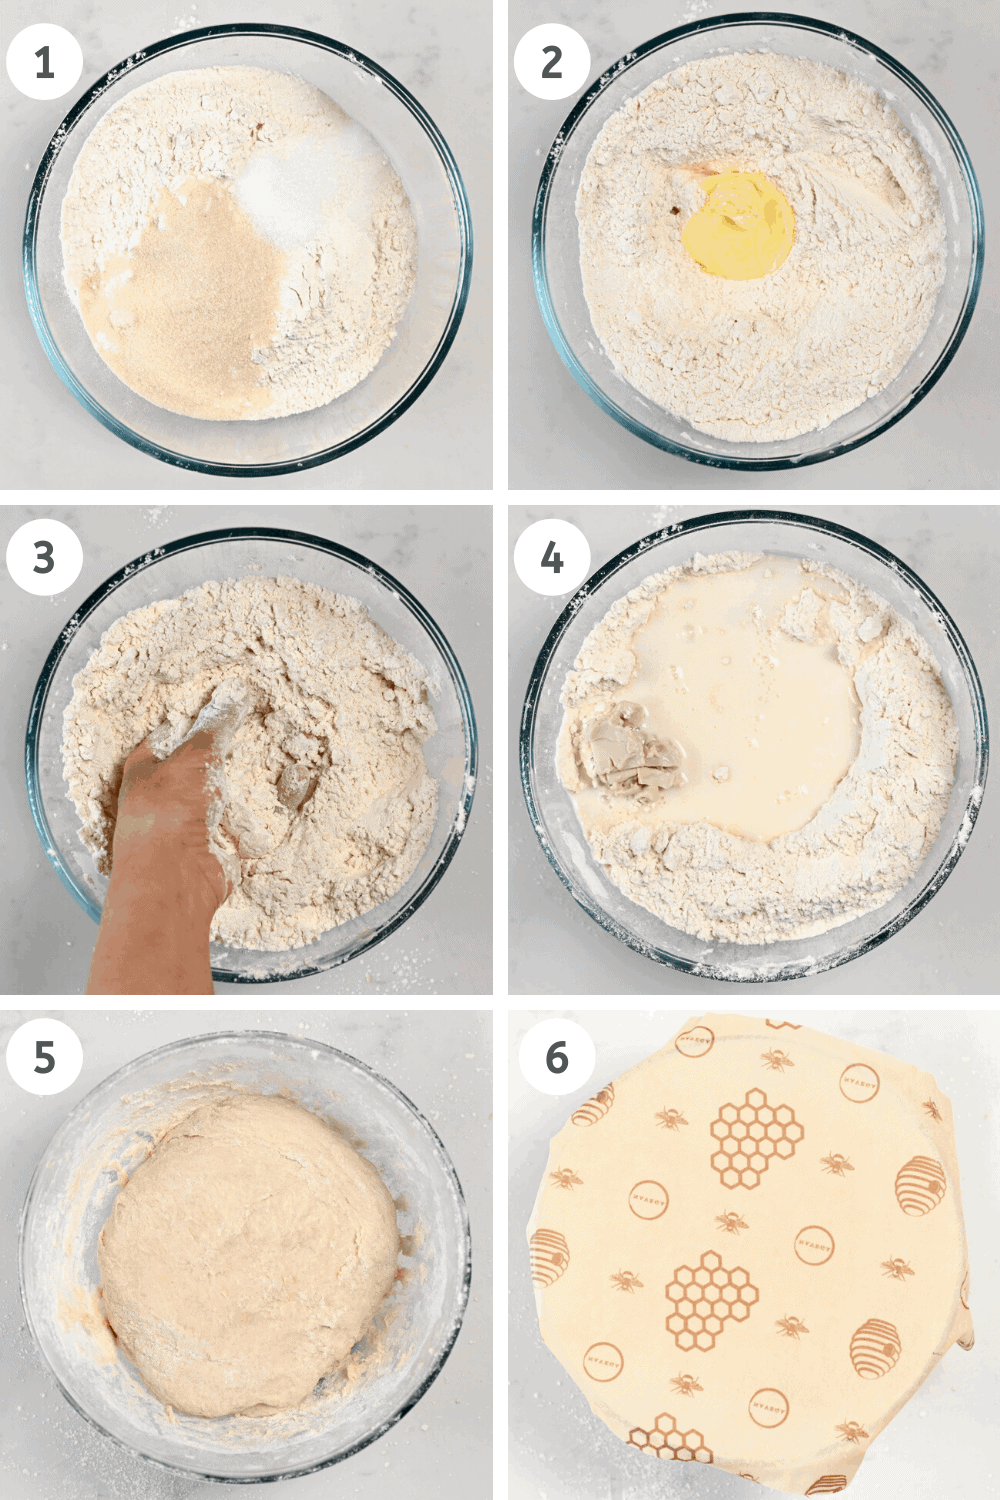
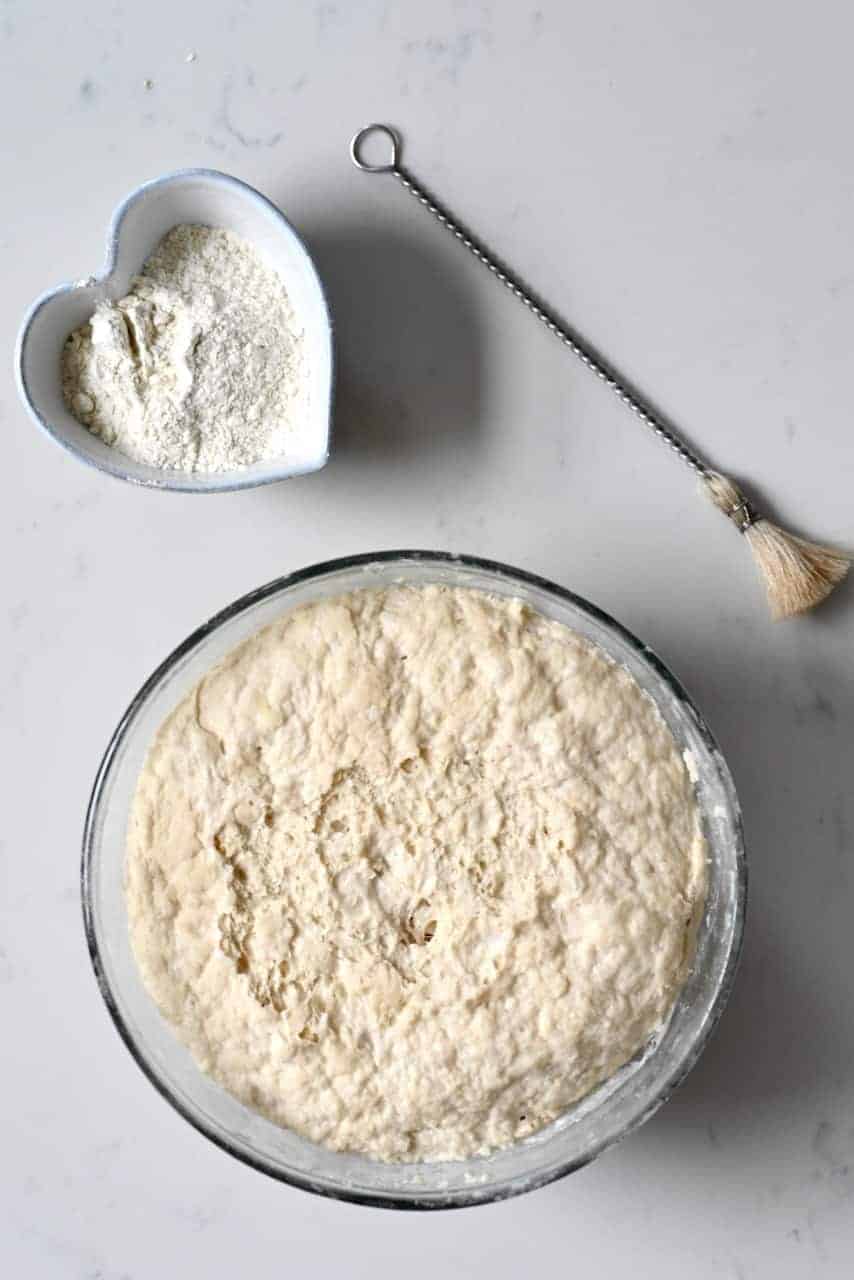
As mentioned above, this recipe is a 3-day long process. If you want to bake your croissants on a Saturday morning, start the dough preparation on Thursday evening. This how-to includes suggested actions and days (these are adjustable). Day 1: Evening Mix the dry ingredients, then rub in the butter (use your hands) followed by the wet ingredients. Mix the ingredients well to achieve a sticky dough. You can also do this in a stand mixer, with a dough hook.
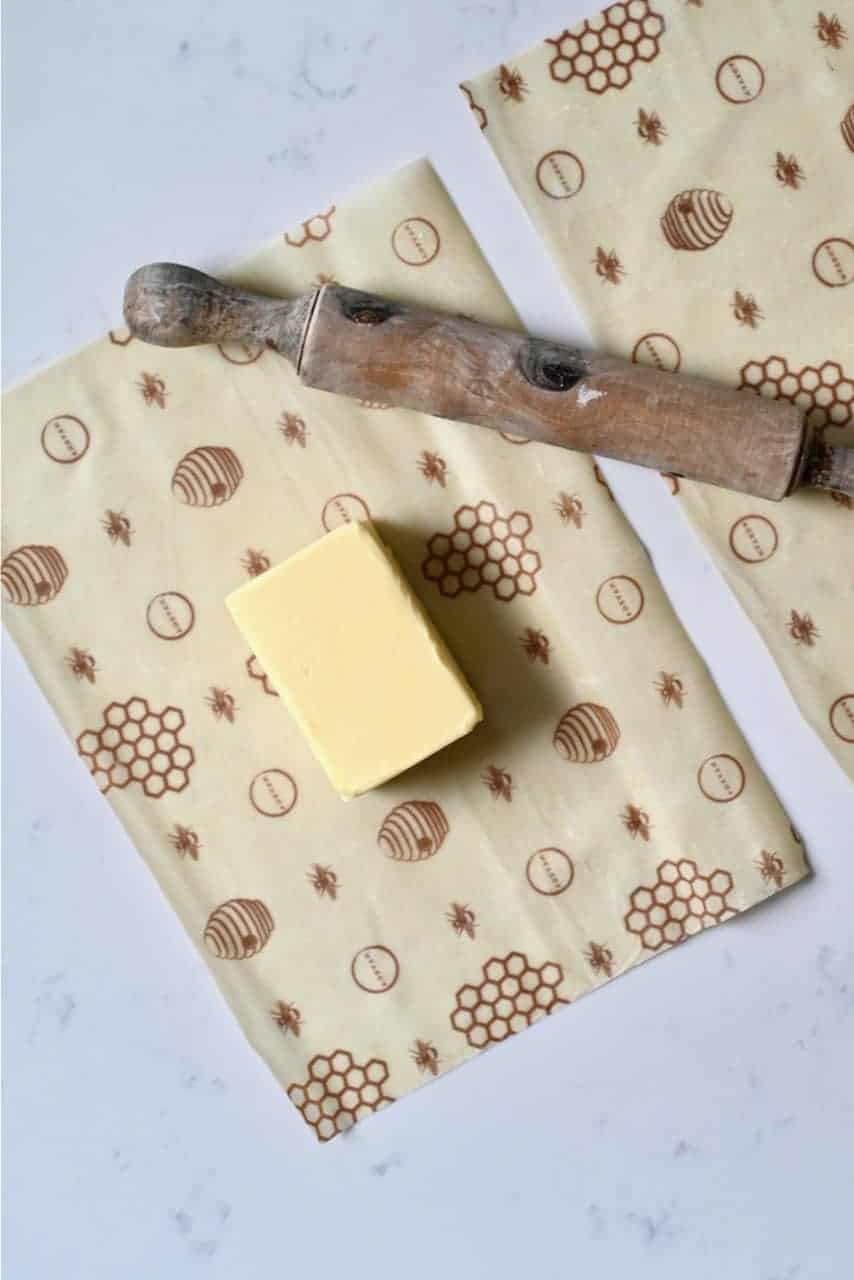
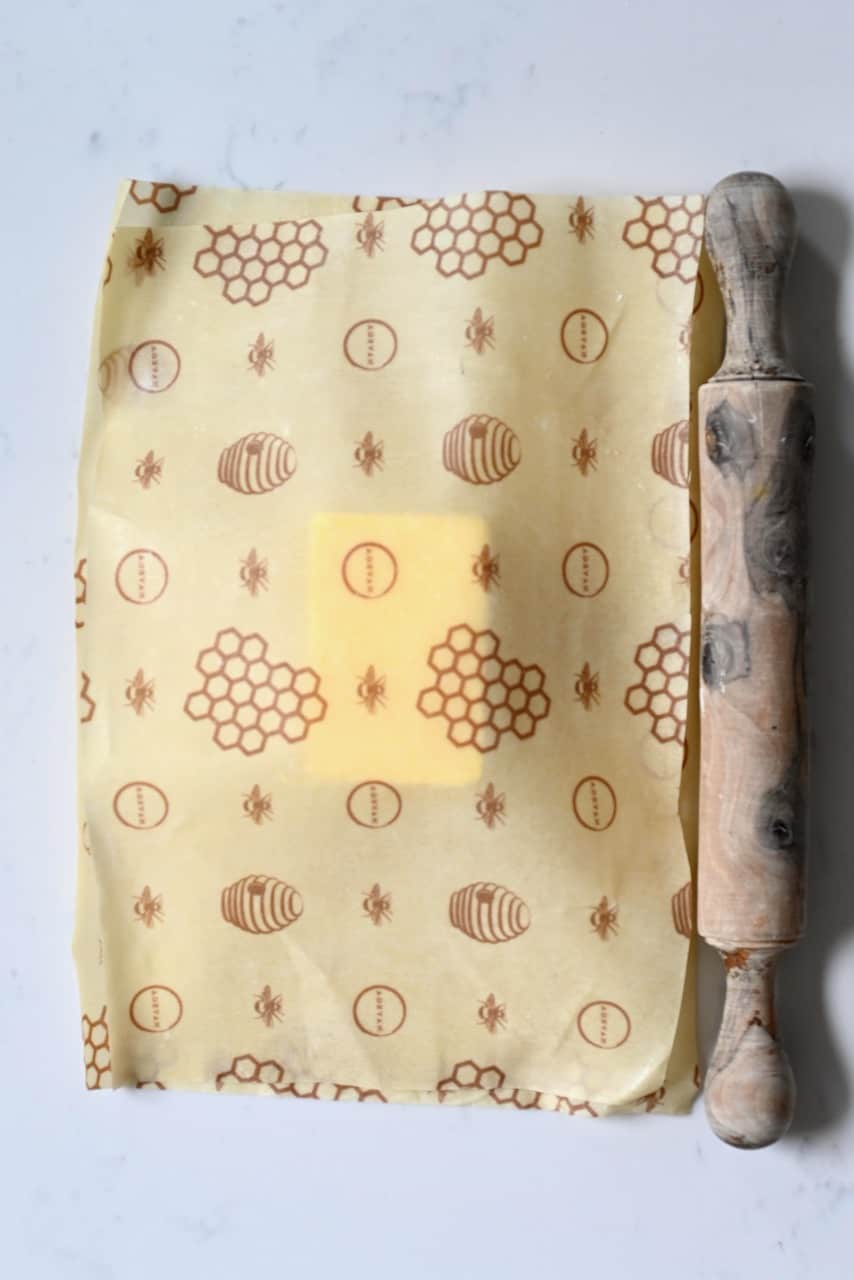
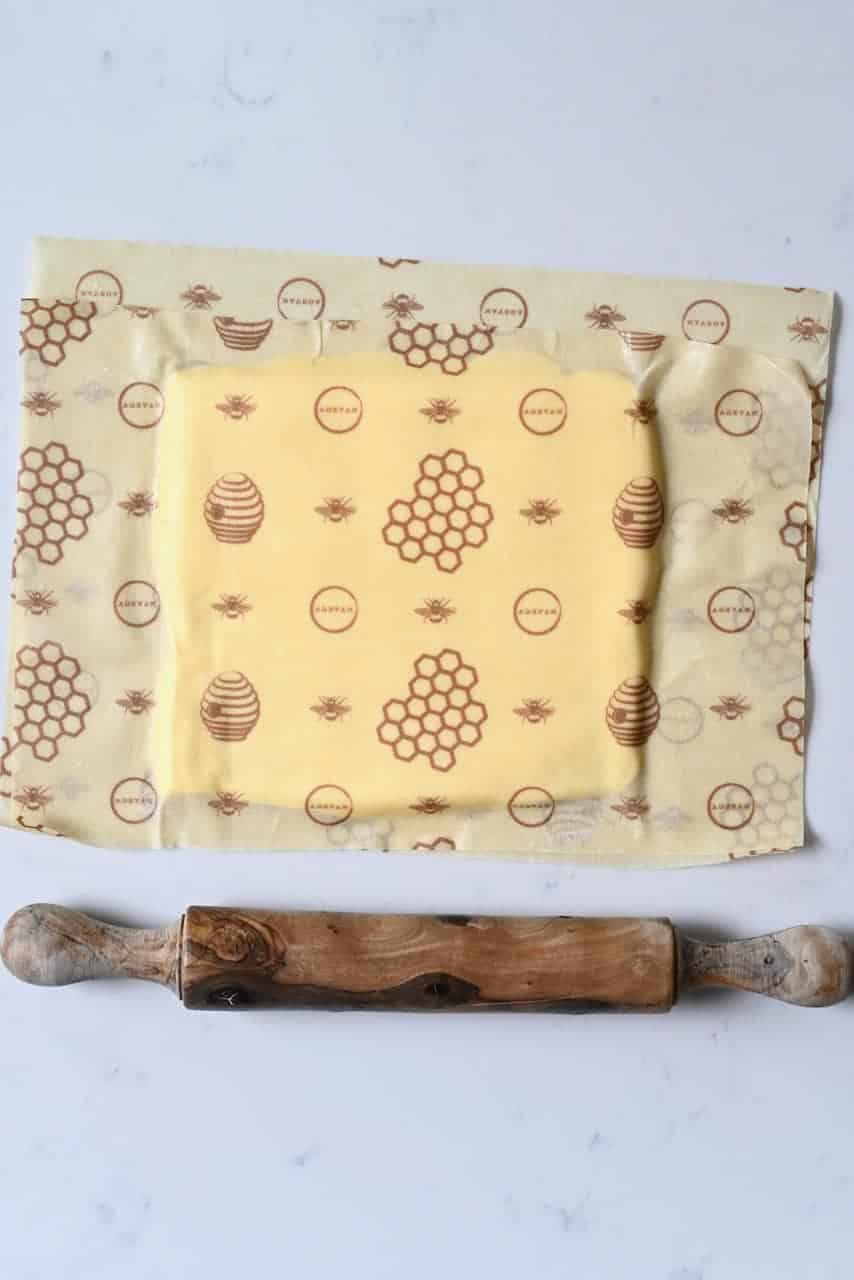
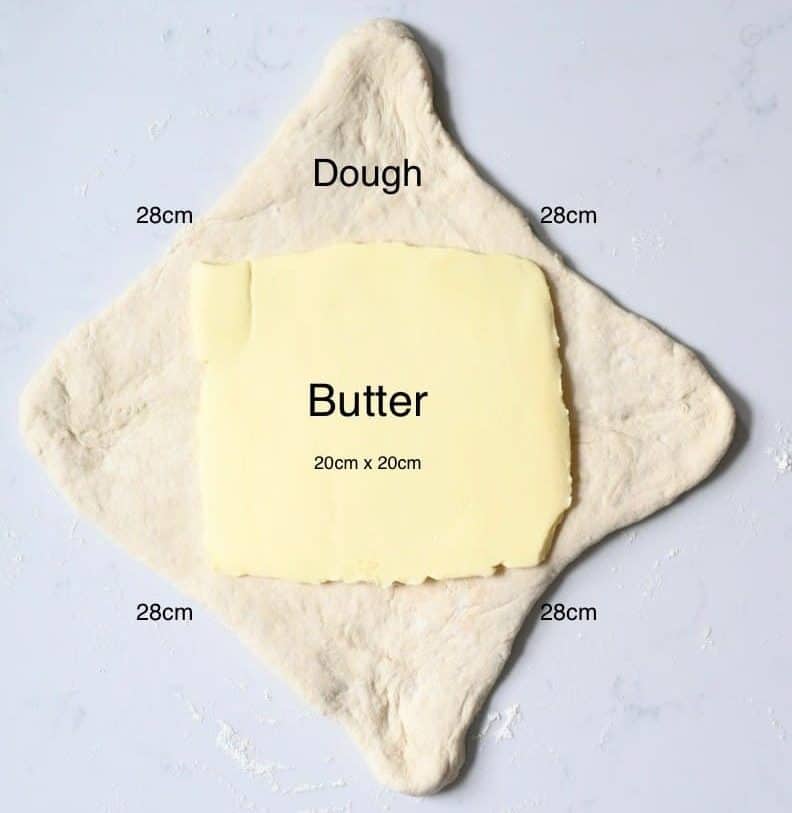
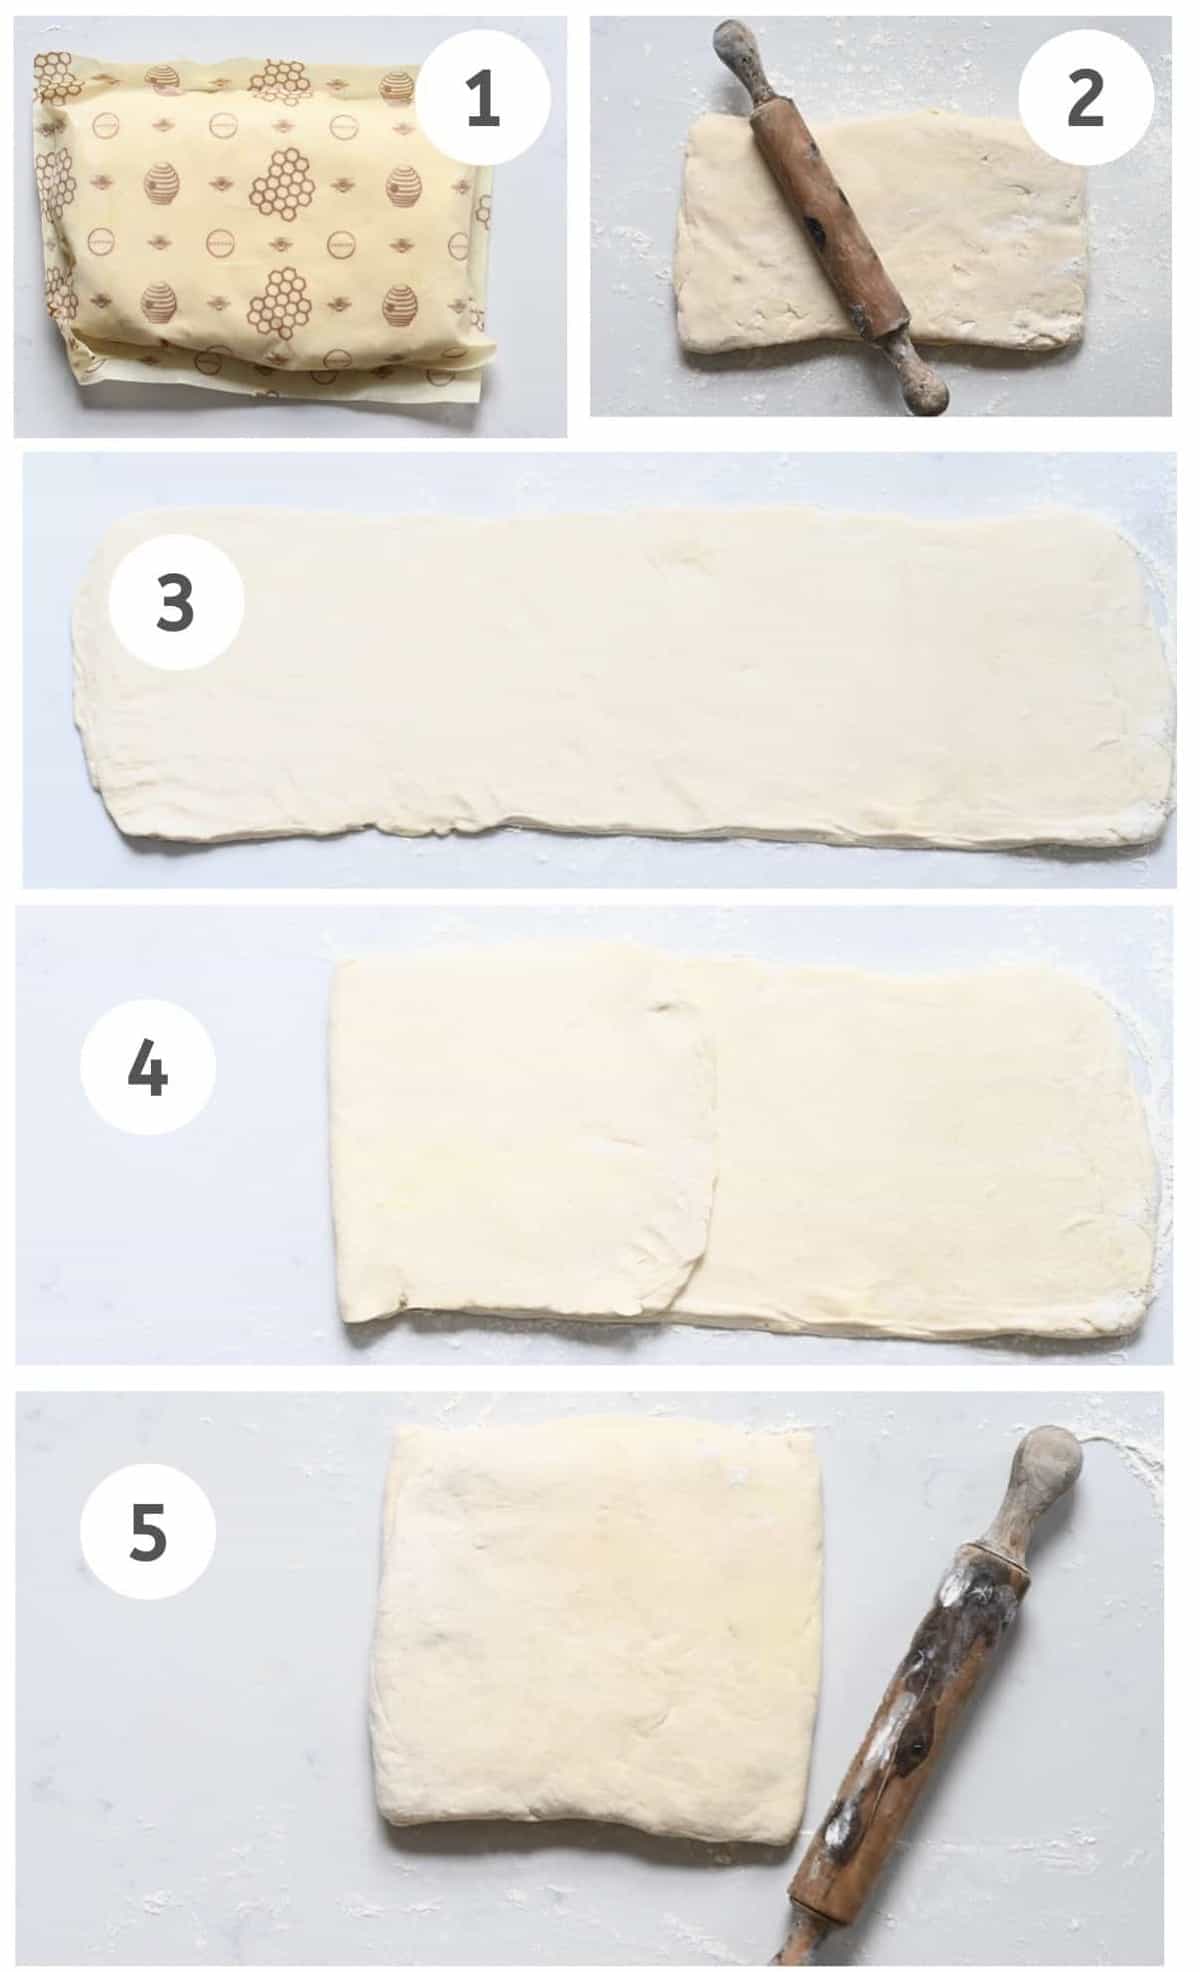
Leave the dough in the bowl, there is no need to knead it. Cover the bowl and place in the fridge overnight (10-12 hours). The dough will slightly start rising. Day 2: Morning After the dough has rested in the fridge 10-12 hours, it’s time to create the layers – this is also known as laminating. You fold butter into the dough. each fold will create new layers. Start with shaping the butter. It needs to be at room temperate (take it out of the fridge about 1 hour in advance). Then using a rolling pin, shape the butter into a 20cm x 20cm square. The thickness should be around 0.5 cm. To do this more easily, roll the butter between two sheets of parchment paper or two beeswax sheets. Place the butter square in the fridge while working on the dough. It needs to be cold but pliable when folding into the dough. Next, it’s time to shape the dough. Place the dough onto a lightly floured surface. Start rolling and stretching the dough until you get a 20cm x 20cm square. Continue rolling the dough to stretch it and make it bigger than the square of butter. It needs to be stretched out to 28 cm x 28 cm. Don’t worry, it doesn’t have to be a perfect square, you can stretch the corners a bit like the photo below (see also how I do it in the video). Place the butter block in the center of the dough and fold in the four corners of the dough, to cover the butter. Make sure to enclose it in tightly, you should not be able to see the butter (Imagine you are closing an envelope around the butter).
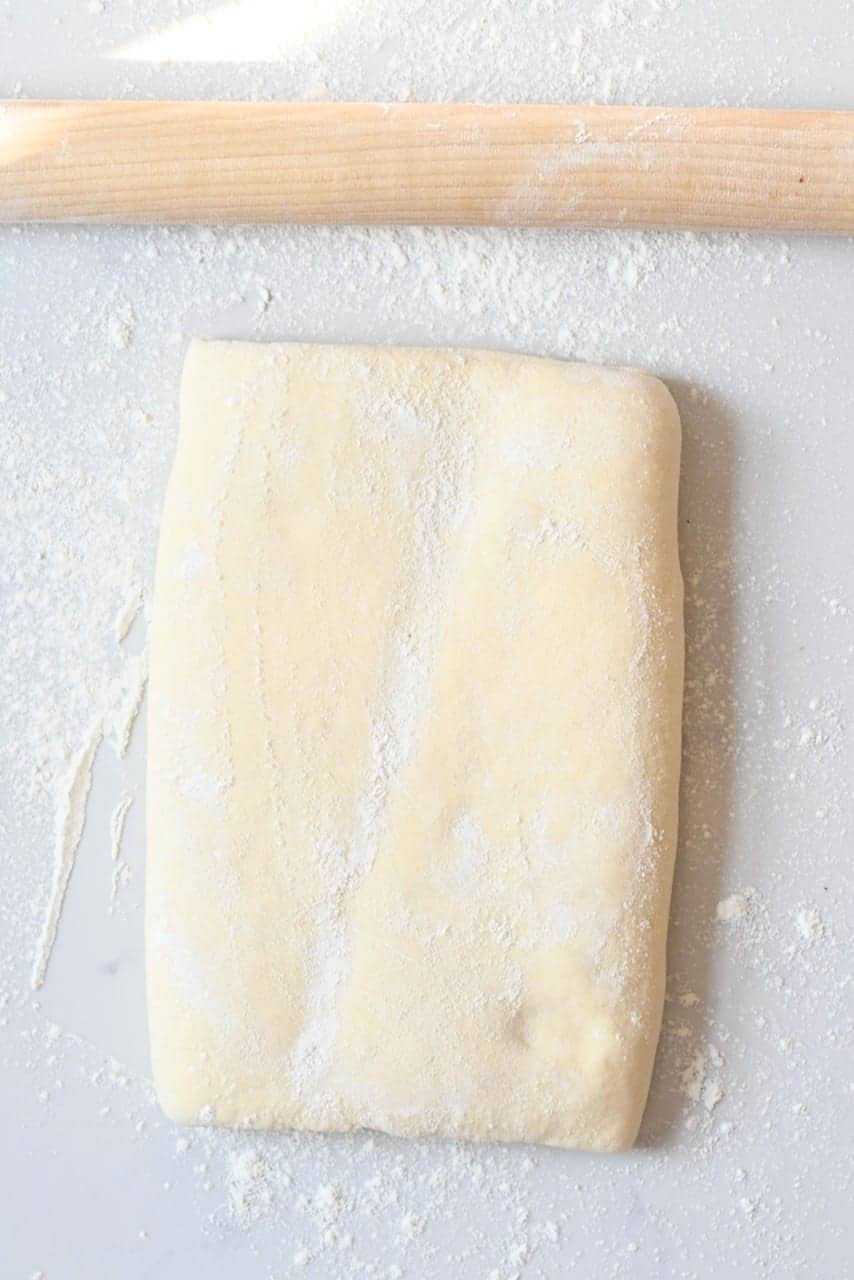
Next, it’s time to laminate the dough. Flour your working surface and roll the dough into a large rectangle. You can help yourself here with a measuring tape. Roll the dough to about 60-65 cm long, 20 cm wide. Then fold it onto itself 3 times. You will end up again with a square of about 20 cm. You’ll need to do this part quickly as the butter needs to stay solid between the layers of dough. If it begins to melt, then it can become absorbed by the dough and won’t result in a flaky, well-formed croissant.
Cover or wrap in plastic wrap and refrigerate for about 1 hour. Then repeat these steps 2 more times
Roll the dough into a large rectangle Fold over into 3 Place in the fridge for about 30 minutes.
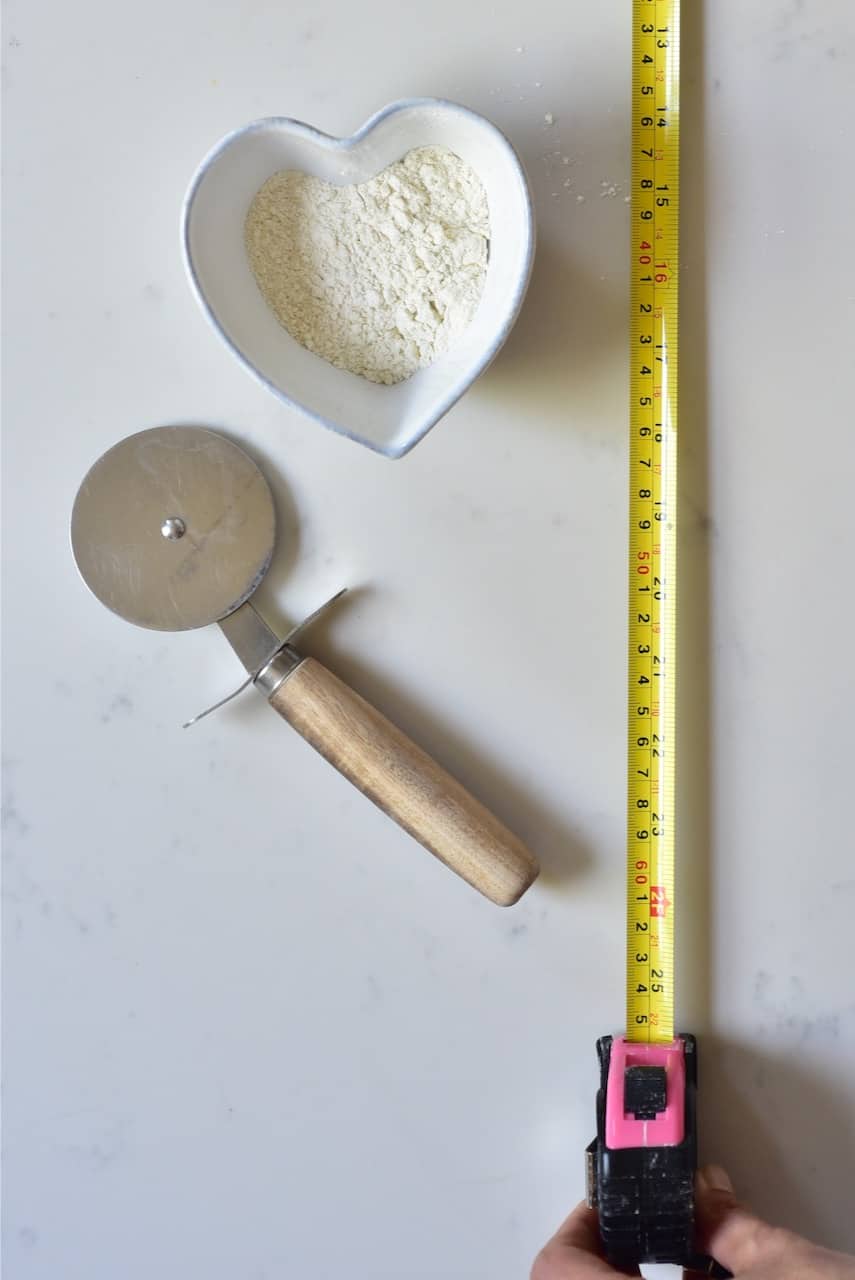
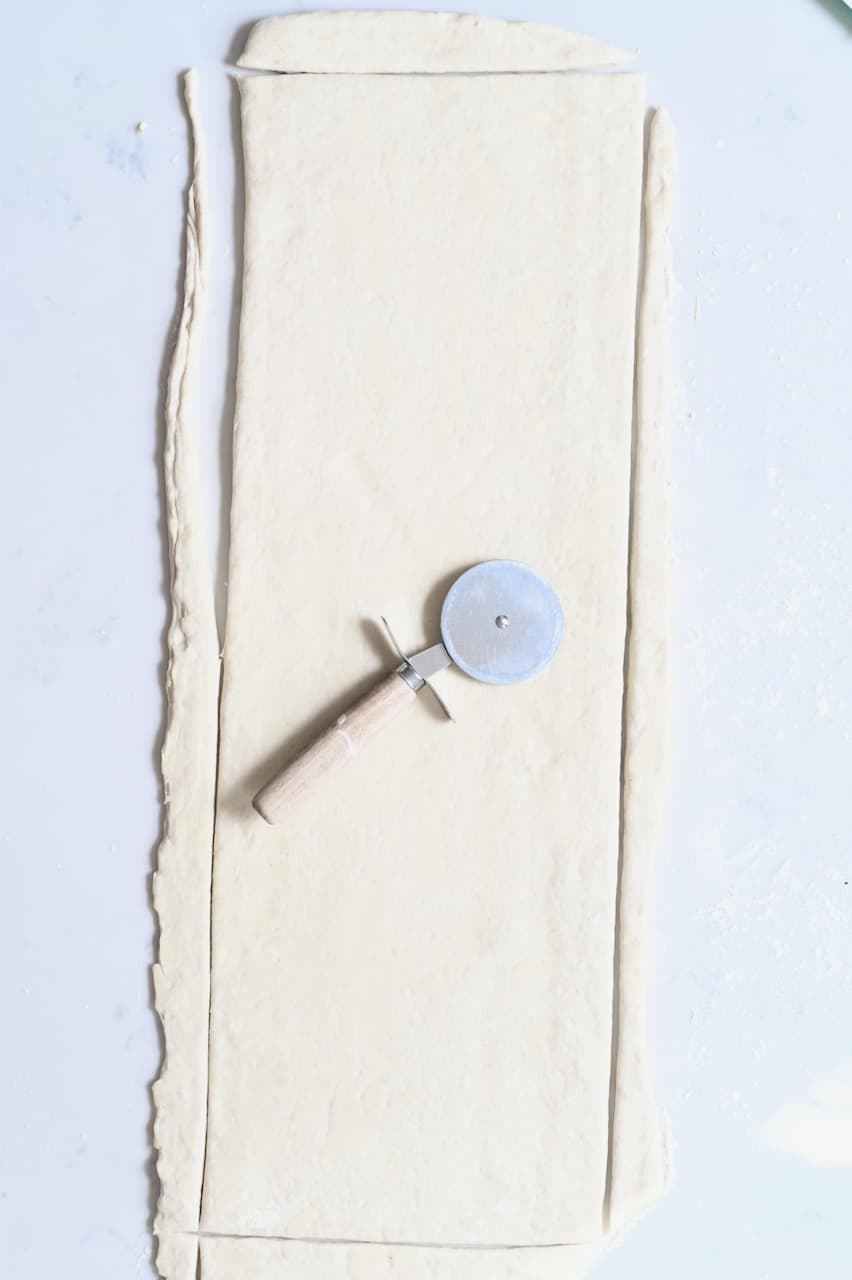
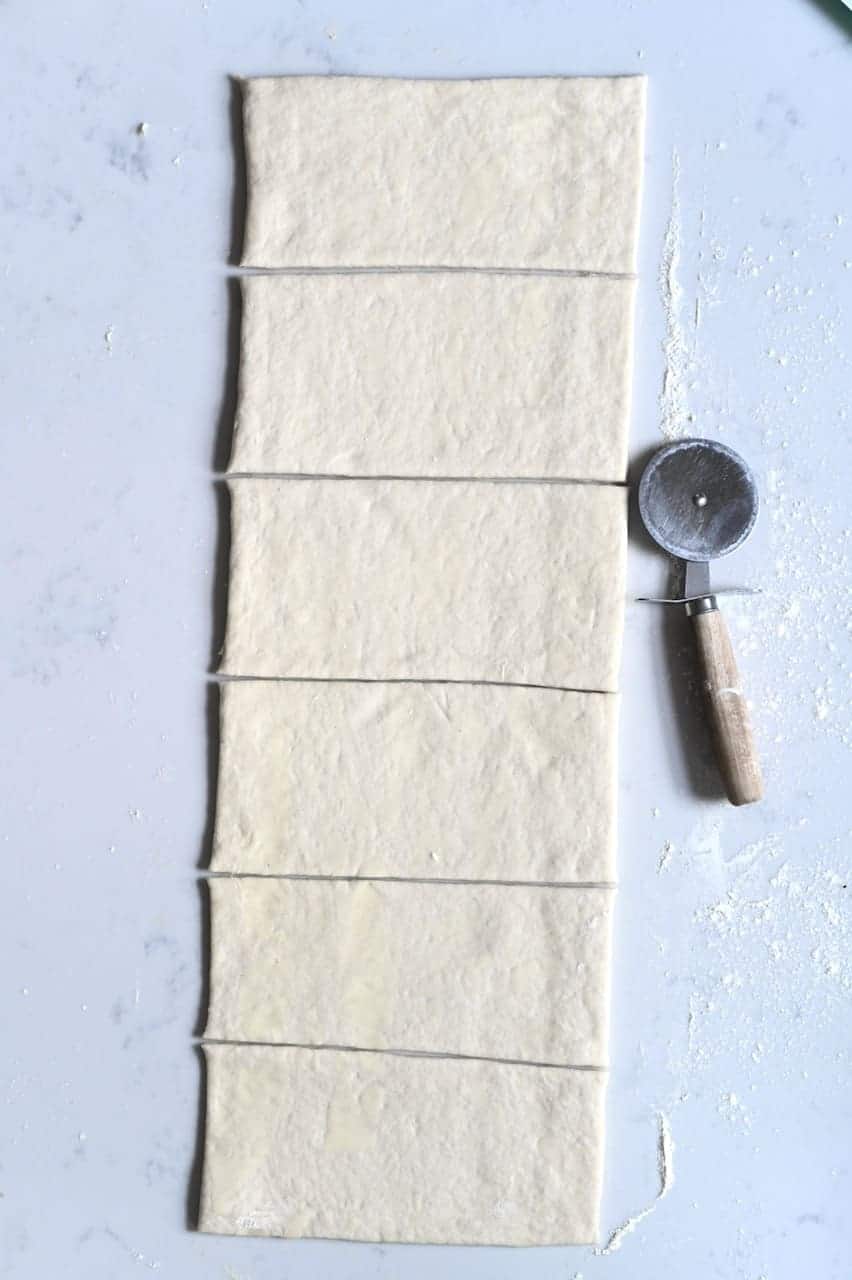
After the third time, your lamination is complete and the dough can be kept chilled in the fridge until you’re ready to roll out your croissants. You can leave this any time from 1-12 hours (I prefer to leave overnight – so around 9-10 hours). This will keep the butter firm and help the gluten to relax for the further rolling the next day, so the layers aren’t ruined. Day 3: Morning It’s time to shape and cut the dough. Roll the dough into a large 60cm x 20cm rectangle. It’s best to use a ruler or measuring tape (see how I did it in the video) and cut away any uneven edges if you want even croissants.
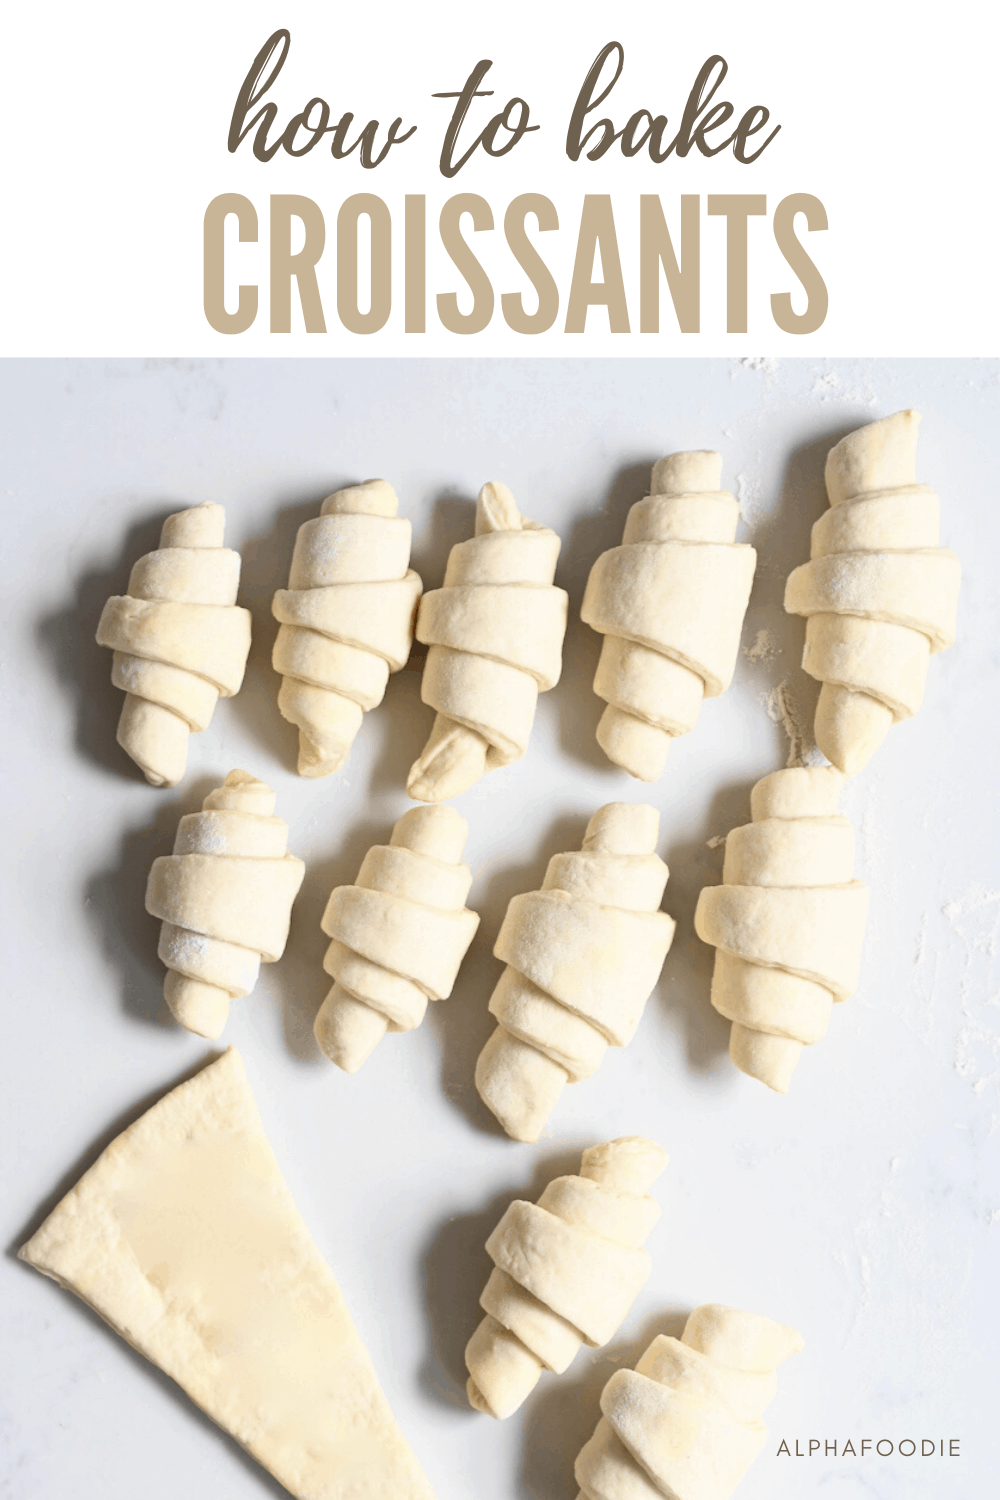
How to roll a croissant
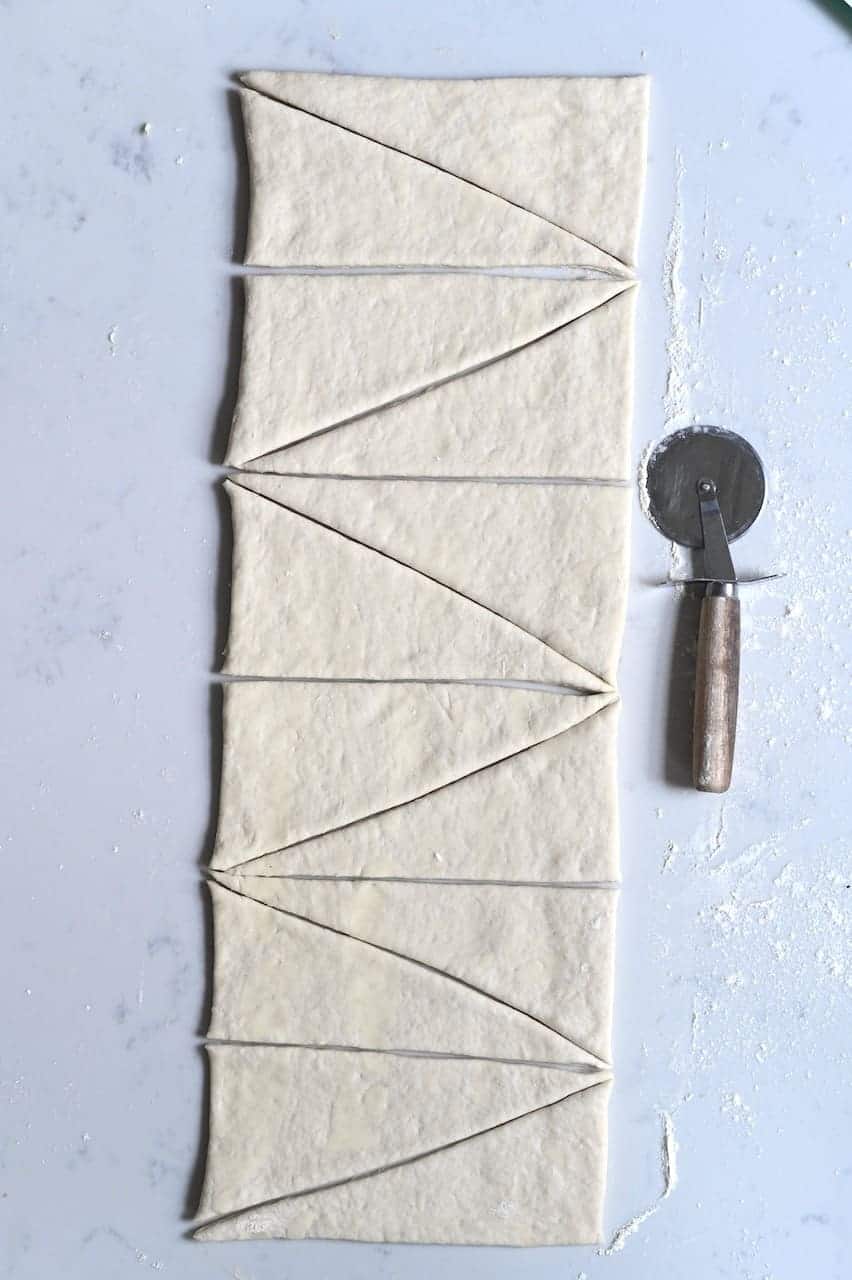
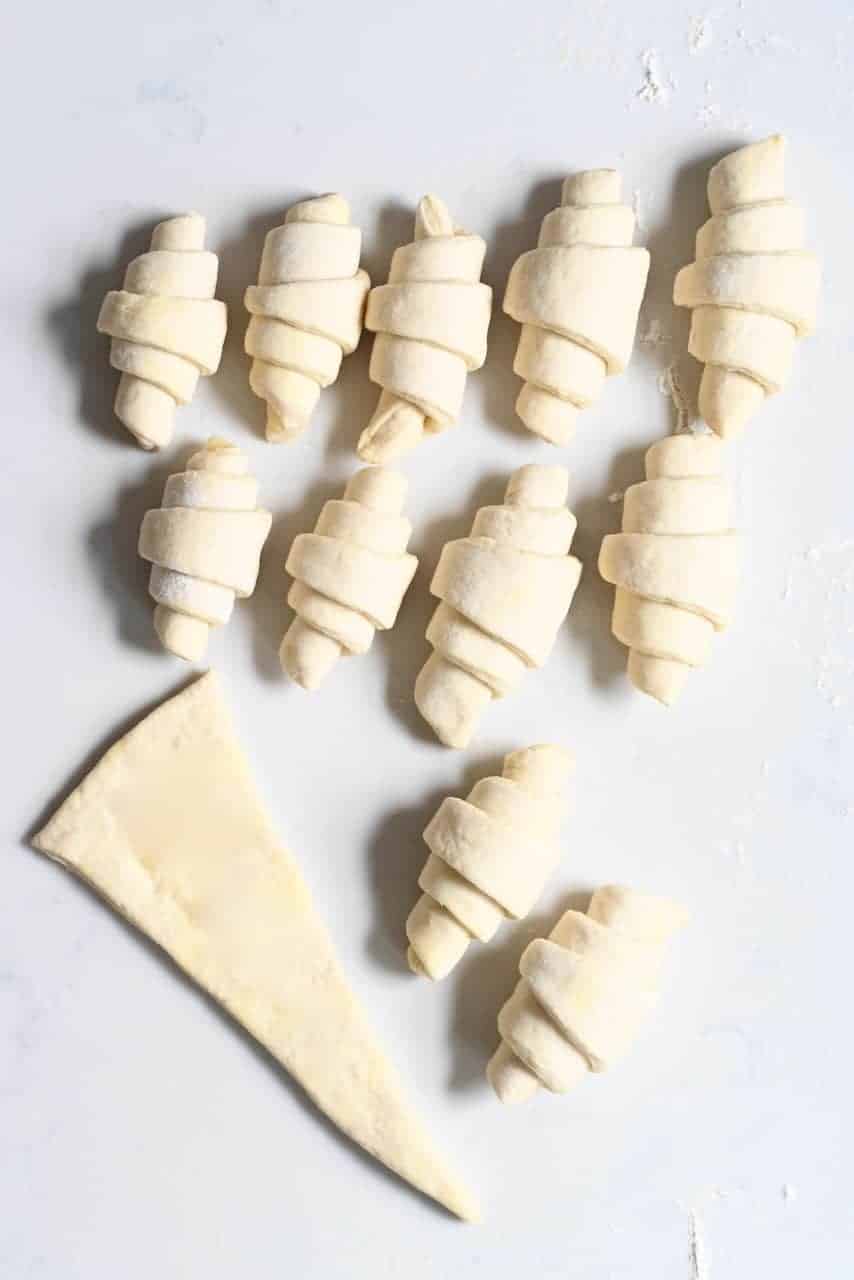
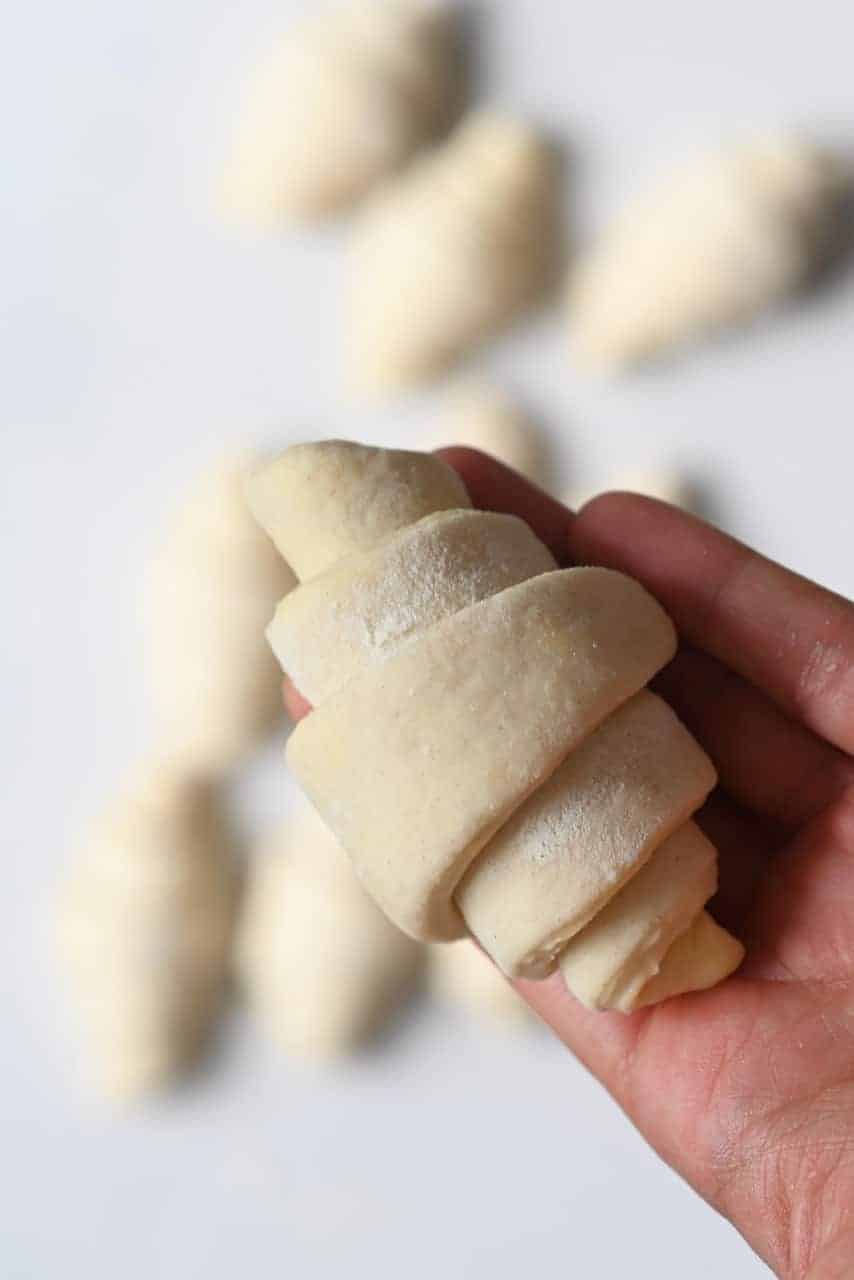
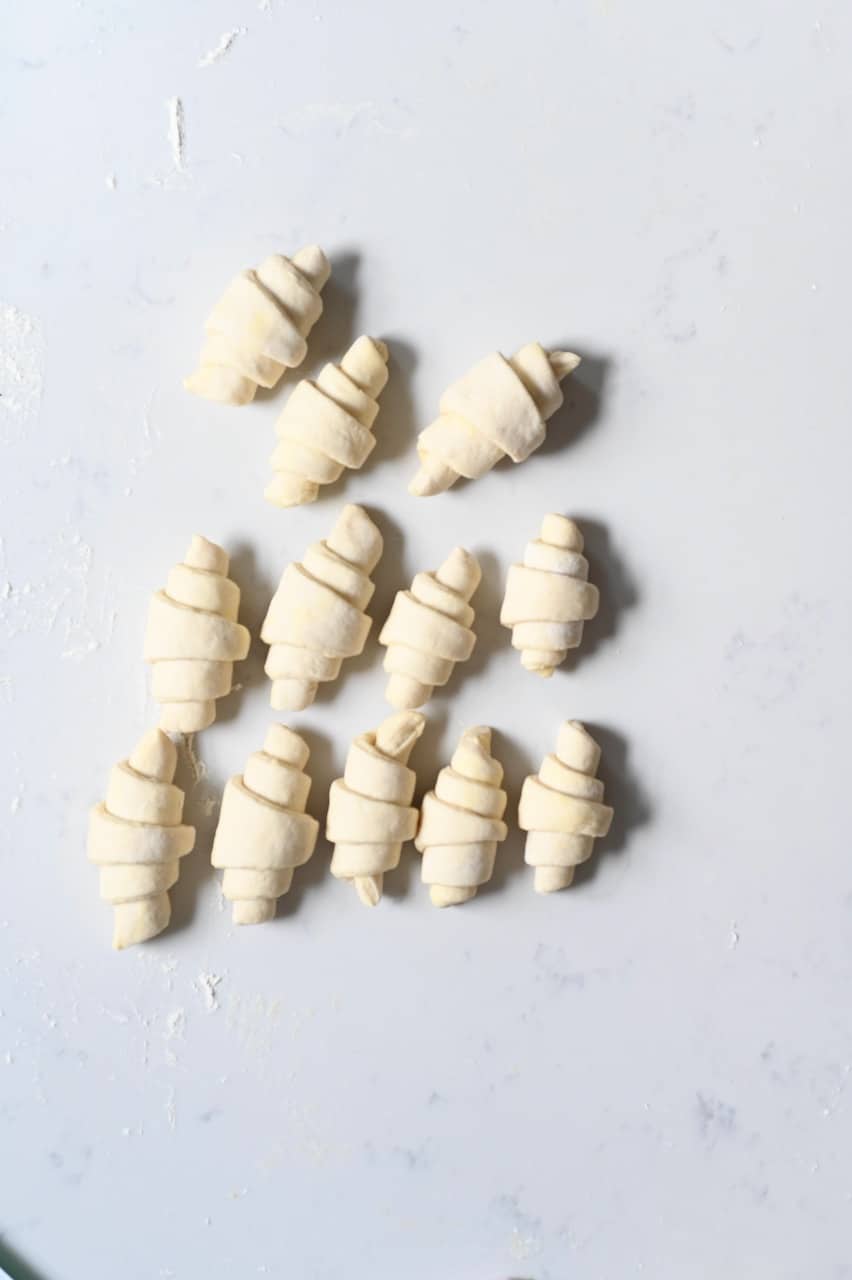
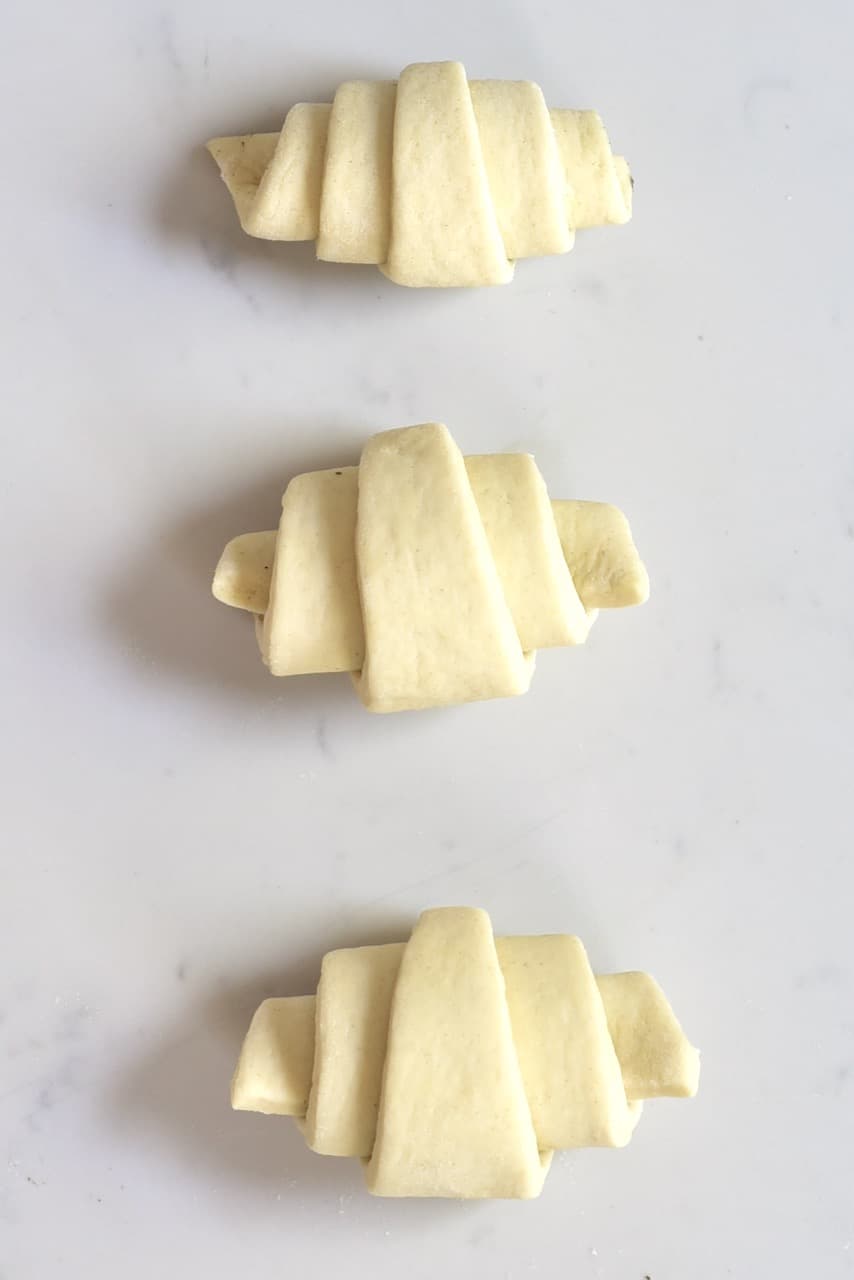
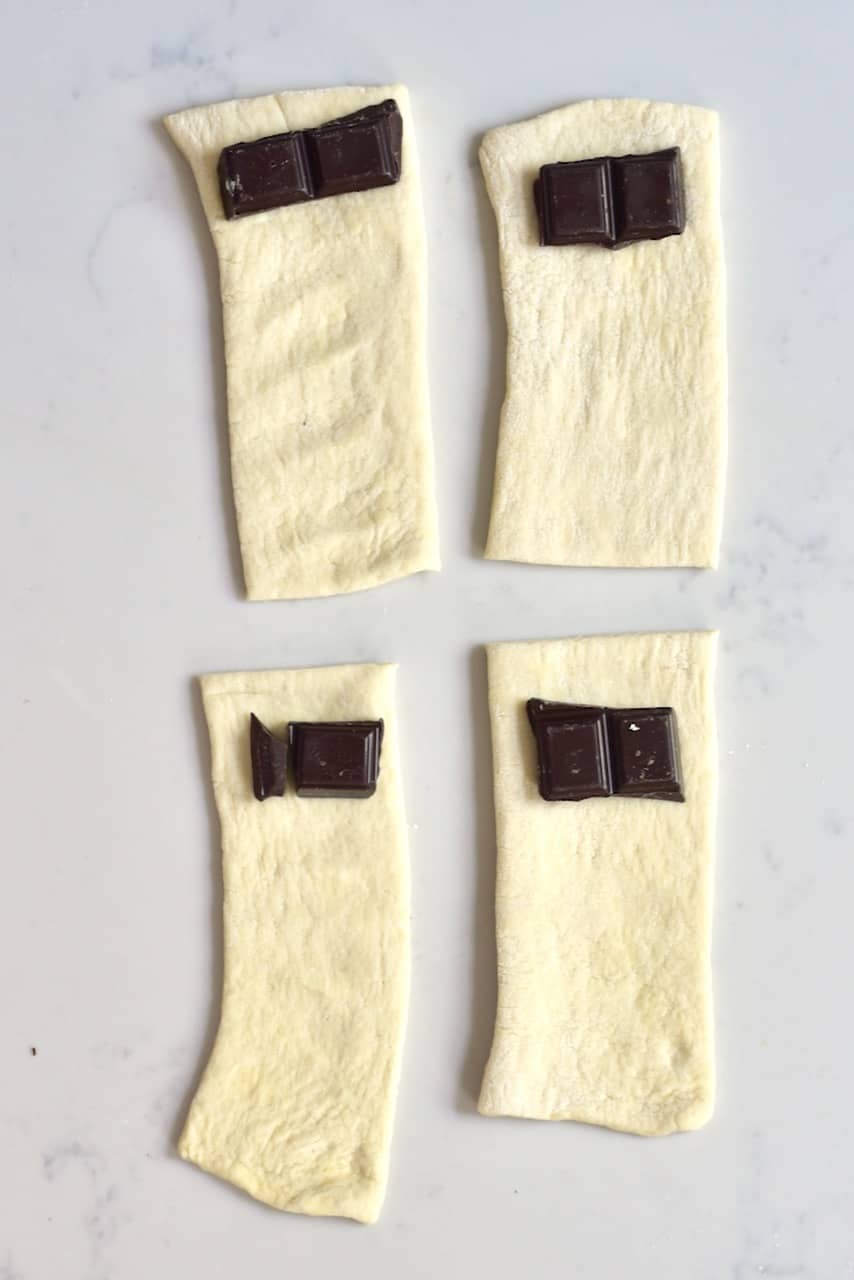
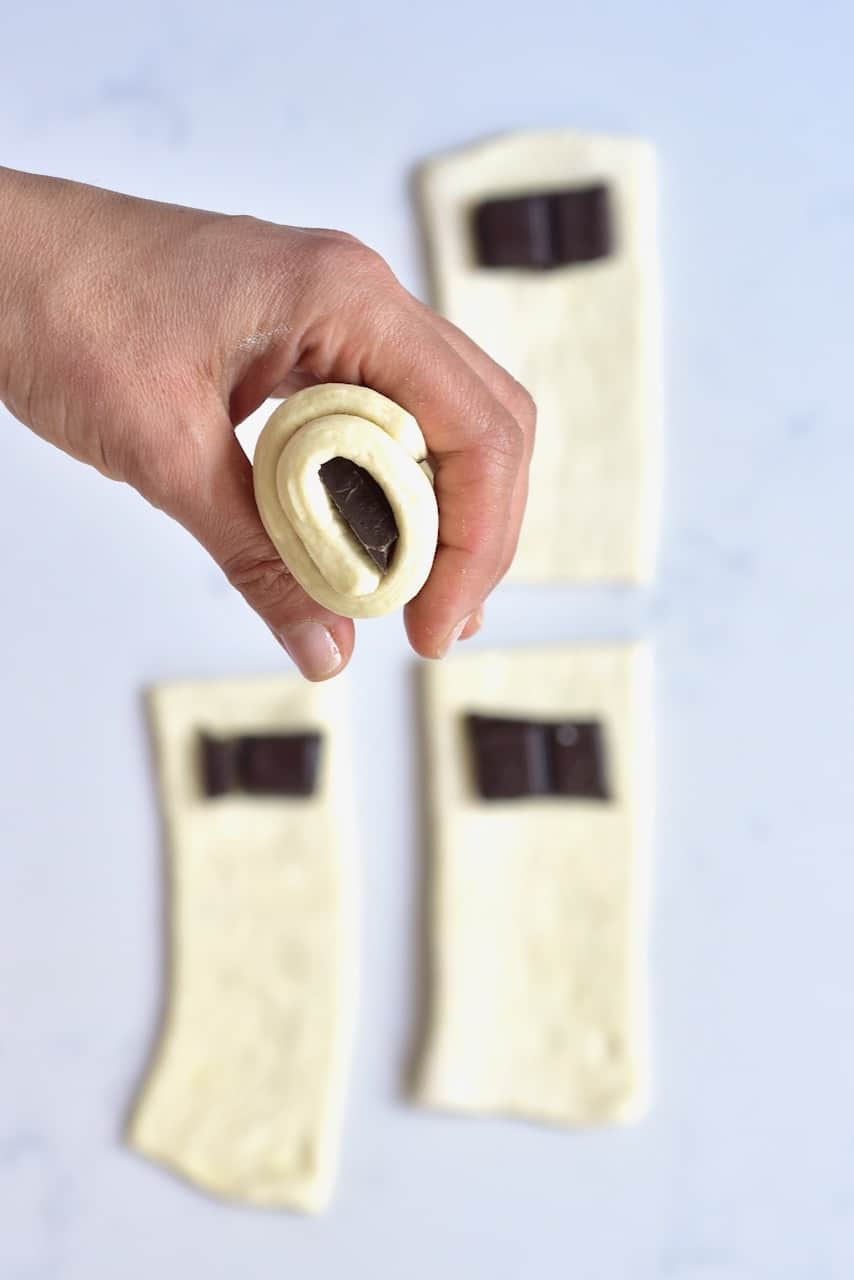
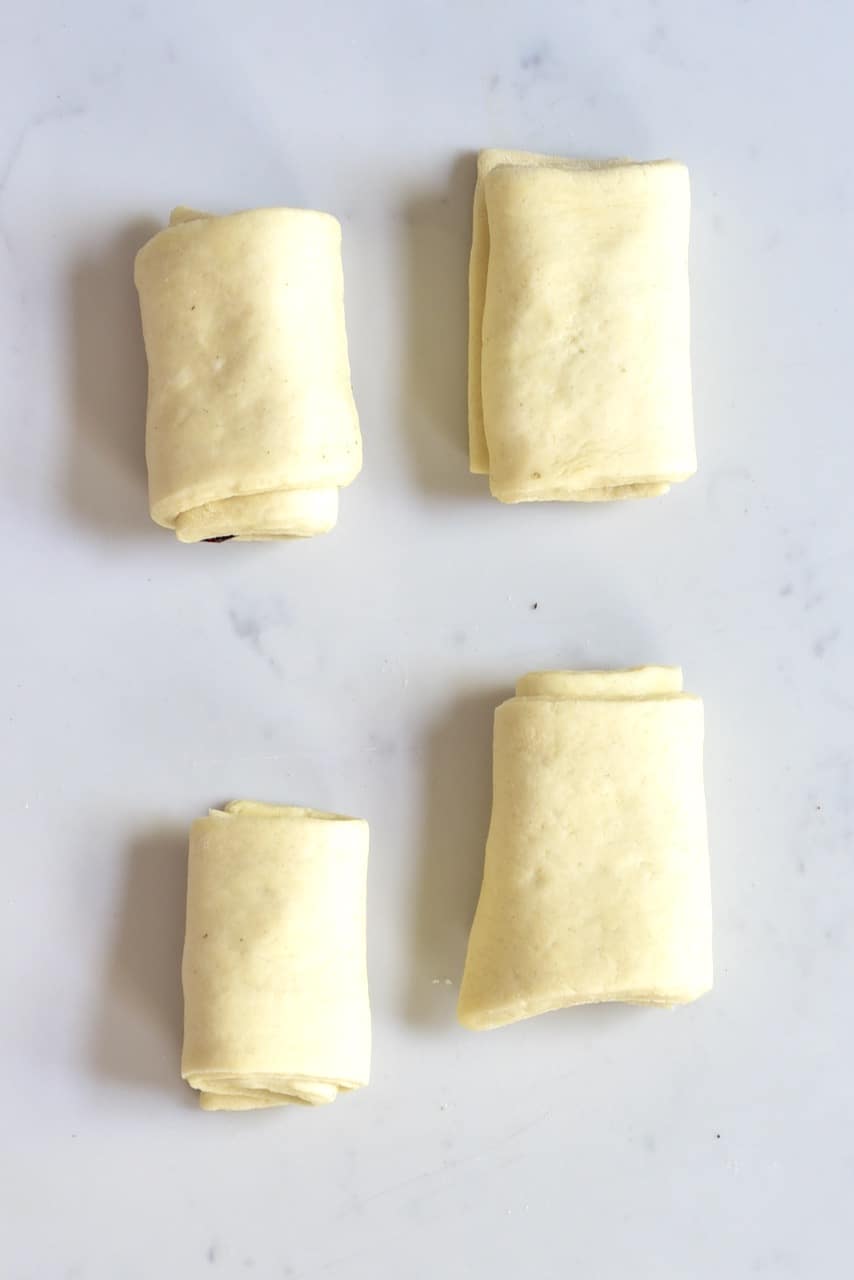
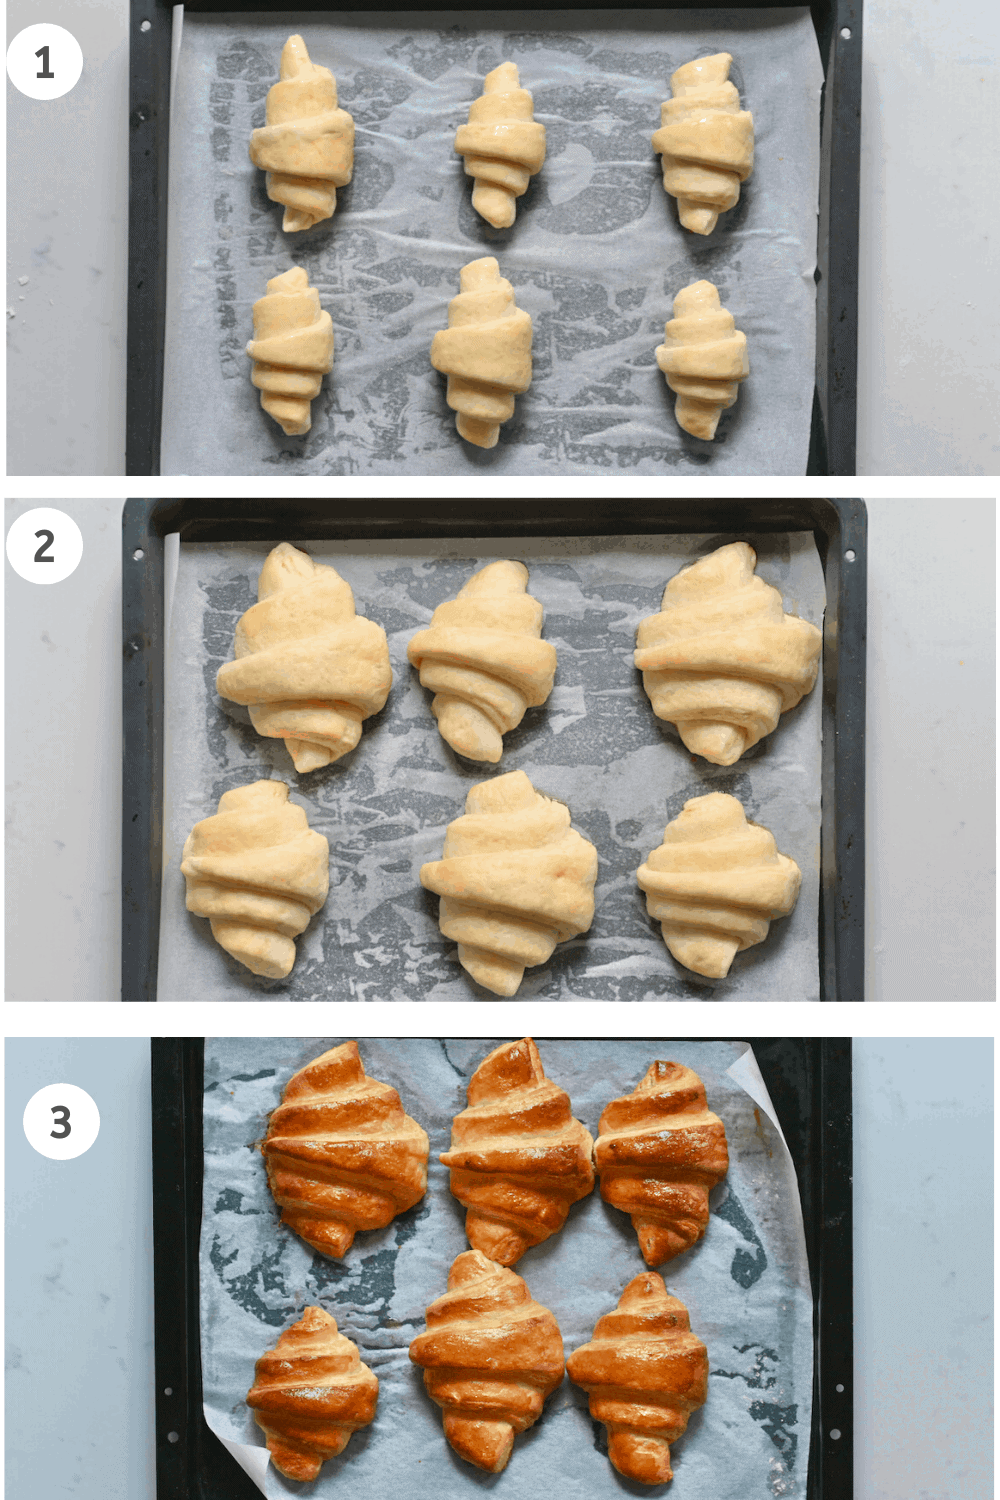
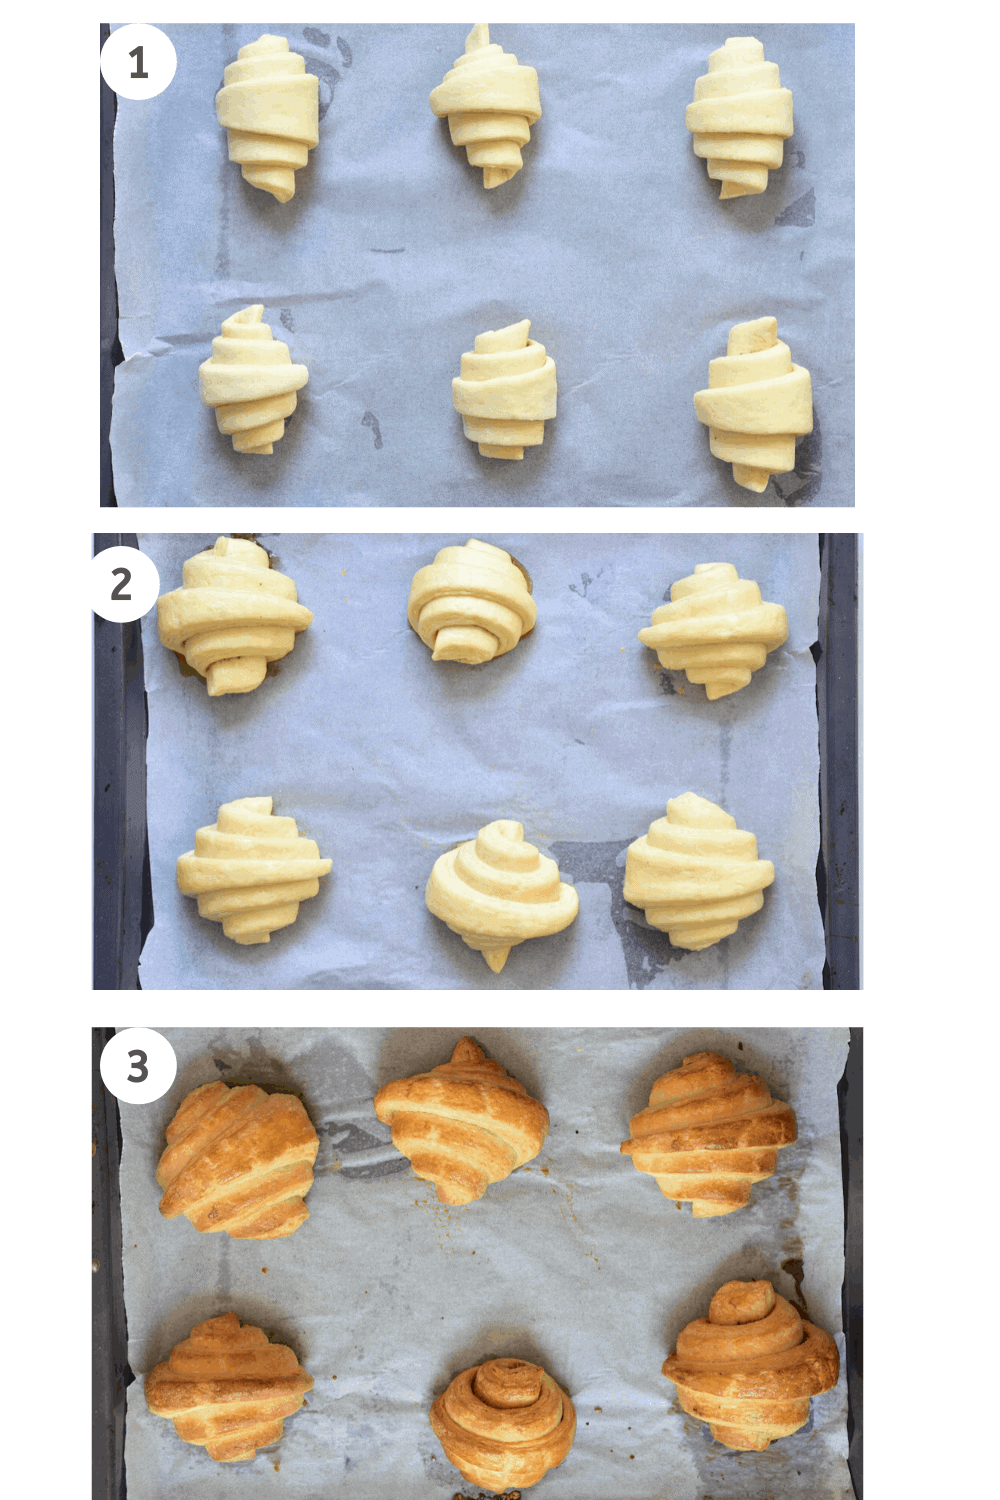
Cut the rectangular dough into 6 even pieces (10cm x 20cm). Then cut diagonally to achieve triangles. I used a pizza cutter for quick, hassle-free cutting. To make regular classic croissants, just roll each triangle. Start at the larger base and roll towards the thin end- make sure you’re rolling the croissant tightly, but without squeezing the dough (as this will squeeze the layers). If you want to make croissants with fillings, prepare your fillings and add them before you roll the croissant. To make a za’atar spice-filled croissant, spread some za’atar and olive oil over the triangular piece of dough, then roll it. To make a chocolate-filled croissant, you can either use homemade Nutella and roll as above OR shape into a pain au chocolat. To make pain au Chocolat, you’ll need rectangular dough rather than triangular shaped. Simply add the chocolate at one end then roll it over – no need to pinch the ends together. Once shaped, you can then place your pastries onto baking sheets lined with parchment paper. Make sure to leave plenty of space between each pastry, as they will be proved one last time and will also expand while baking. I fit 6 per large baking tray. Next, prepare the egg wash – squeeze the lemon into the egg, add water and whisk well. It’s best to sieve the mixture to make sure it’s smooth. Note* you can also use a single beaten egg. However, I prefer the results with the egg, water, and lemon.
Apply the egg wash onto the croissant. Then, let them proof for a final 30-45 minutes (they will double in size) in a warm place (ideally at 24ºC). After about 30 minutes you can check if the croissants are ready – they should wiggle and be double in size (check the video). Once proofed, apply again the egg wash. Then bake. Bake in the oven for 18-20 minutes at 180ºC until golden and crispy. Once baked, your pastries will be a lovely golden brown color. The plain croissants will be full of nice air pockets – whereas your filled croissants will be slightly denser, but nevertheless tasting wonderful. Personally prefer the stuffed croissant – especially since your options are endless
How To Store
Storing fresh croissants: It’s true that croissants taste best the day they are baked. However, any leftovers can be stored covered at room temperature for a few days or within the fridge for a week. Can you freeze croissants? – You can indeed. These freezer-friendly croissants can be frozen for up to three months. simply leave to thaw before heating them.
Other Recipes You May Like
If you’re in the mood for some more pastries then you may like this Ricotta & Spinach Tarte Soleil, or even this Chocolate pastry tarte soleil. You may also like these Spinach Fatayer (Lebanese spinach pie). If you have any questions, leave a comment below Also, I love seeing your recreations so feel free to tag me on Instagram @AlphaFoodie.