Oct 12, 2015, Updated May 07, 2023
If you were to ask me to make a list of my most favorite dishes in the world, pav bhaji will definitely make it to the list. In fact chaat (common term used for Indian street food) and pav bhaji will be there among the top 3 for sure. For those who don’t know pav = bread/dinner roll and bhaji = mashed veggies with spices. This is an extremely popular dish all across India, yes the dish is originally from Mumbai and I have to say you do get world’s best pav bhaji in Mumbai but it is extremely popular all through the country. What makes pav bhaji so popular? I don’t know but as long as I can remember, I was always in love with it. Whenever we would eat in a restaurant, I would always check the menu to see if they had pav bhaji on it and if they did, then I knew what I was ordering. As the name suggests, there are 2 parts to pav bhaji .
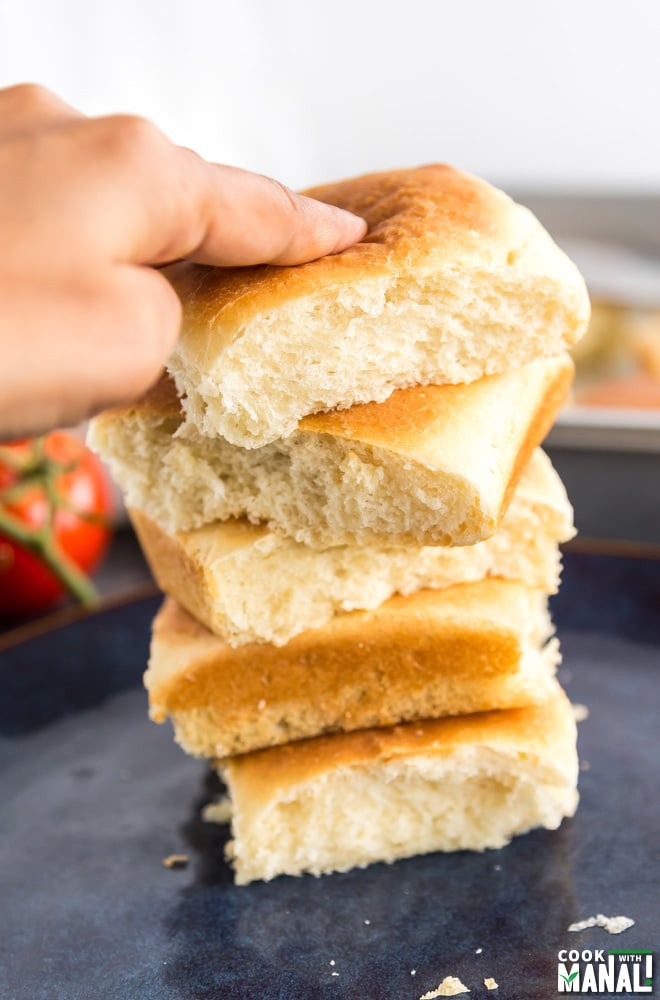
- The Pav Bread , which is the bread that is served with the bhaji. Pav is almost like a dinner roll but made with few very simply ingredients. It’s actually what a common man in Mumbai eats almost everyday for breakfast. Pav is eaten with butter and also with vada (deep fried potato fritters). Vada pav is also extremely popular! This is also known as Ladi Pav.
- The Bhaji, which is mashed veggies. Potatoes, bell pepper, beans, tomato and onion are commonly used. All the veggies are boiled and then mashed and cooked with a special blend of spices. It is so good!
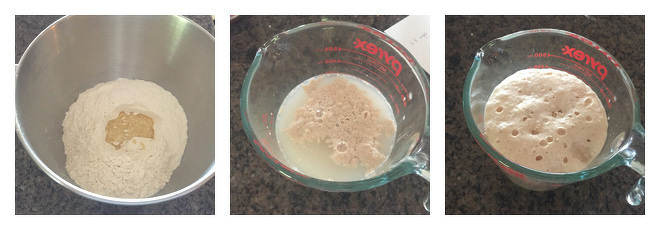
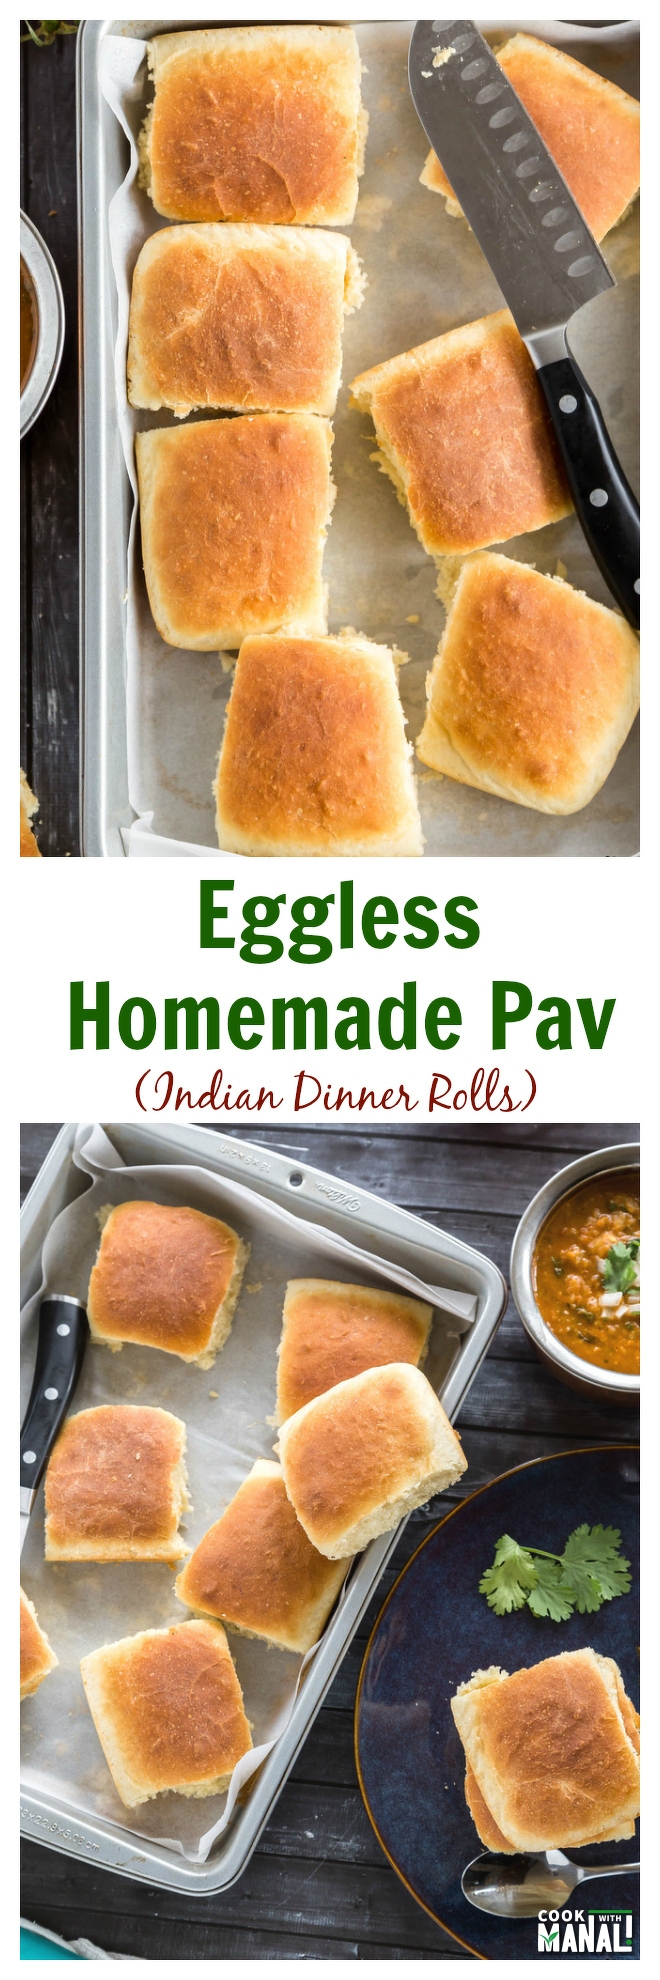
I make pav bhaji at home once in a while and initially when I made it here it never tasted as good as back home. I figured the reason was the pav, store bought dinner rolls/hamburger buns here are not the same as the pav we get in India. We get some pav at Indian grocery stores, but I don’t like them either. And so it all came down to making pav at home. Like I always say, if you really love something and want to eat it, you just need to learn how to make it. And I am so super excited to share this recipe with you guys. These homemade pav turned out fabulous! To make these homemade pav you only need flour, butter, milk powder, salt, sugar, water and yeast. These simple ingredients when combined together result in soft and delicious pav! You need to make this! Method In a bowl mix flour, milk powder and salt. Add melted butter to the flour and mix. Set aside. In a mug/bowl, take warm water, add sugar to it and then add the yeast. Give a quick stir and let the yeast activate for 5-10 minutes. This is called proofing of the yeast. You will know your yeast is proofed/active when it’s all bubbly and frothy on top. If your yeast doesn’t turn up the way it is in the picture, it is dead. Throw the water and start over again. Do not add this water to the flour, the yeast will not work and you will get hard pav buns.
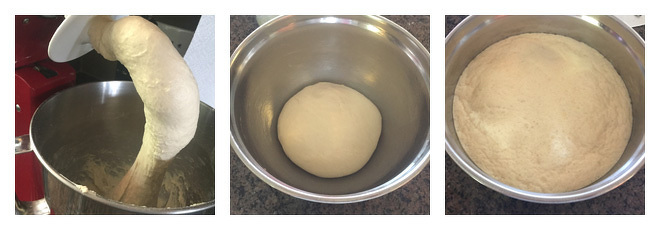
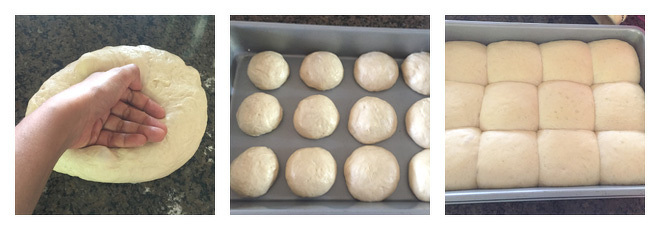
Transfer the flour mix to the steel bowl of your stand mixer or you can do this with your hands. Add the activated yeast liquid to the flour. Knead the dough for 7-8 minutes using the dough hook attachment (or knead for 10-12 minutes using your hands). At this point I added additional 3 tablespoons of flour as I felt the dough was sticking a lot. You can do the same. Your dough is done when it looks smooth and springs back when you poke it. Transfer dough to a bowl and oil/butter it on top and on the sides as well. The bowl should also be coated with oil. Cover with a damp cloth and let the dough rise for 1 hour in a warm place or till it doubles in size. Once the dough has risen, transfer it to a floured working surface. Punch to release the air and let the dough rest for 10 minutes. Divide the dough into 13 equal parts. I used my kitchen scale to make sure they were all same size. Make round balls, smooth each ball and place in a 9 x 13 inch baking tray. Leave a little space between each dough ball as they will expand. Cover and keep the pan in a warm place for 30-45 minutes. The pavs will expand.
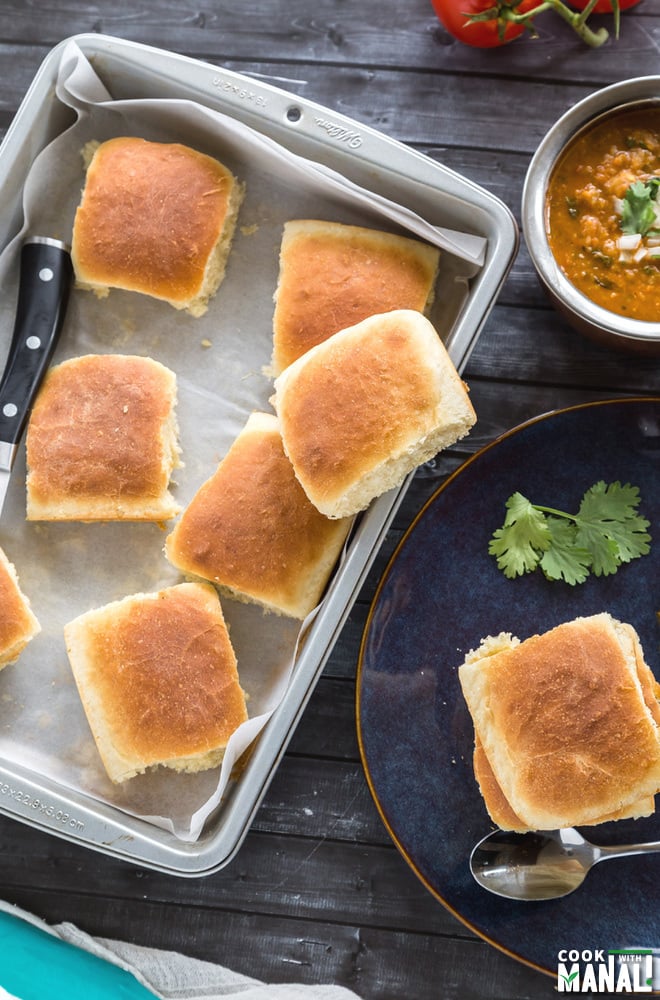
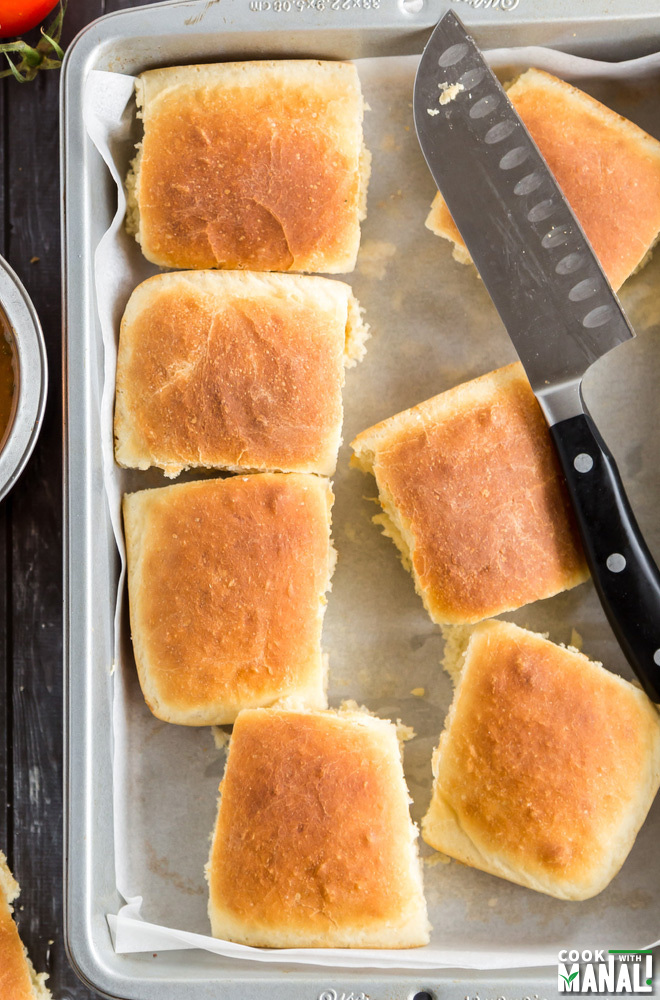
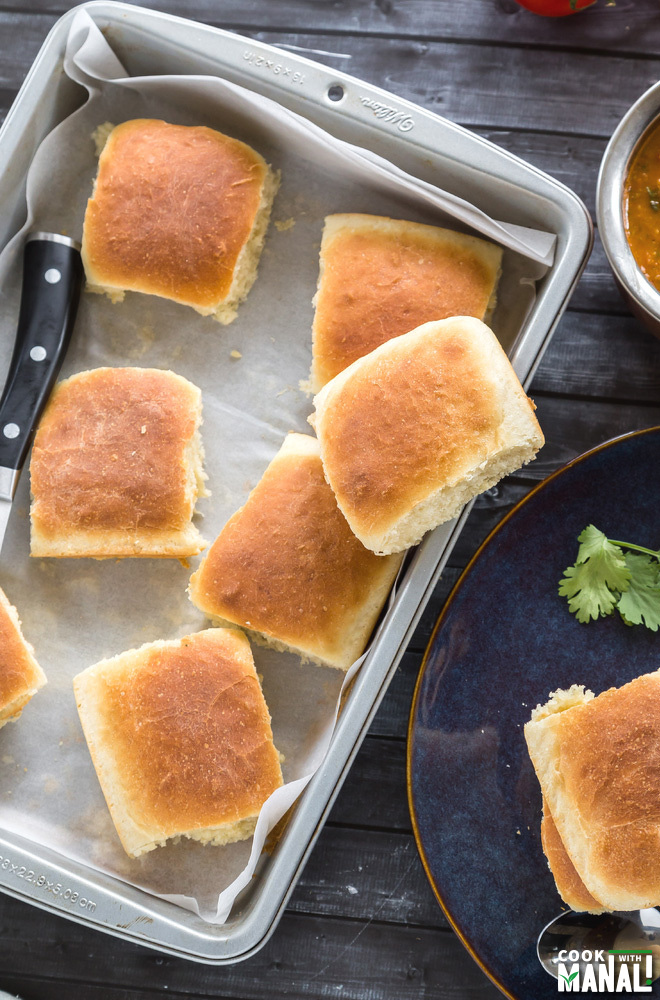
Bake at 400 F degrees for 12-14 minutes. Remove from oven and if you want, brush some melted butter on top as soon as they are out of the oven! Enjoy these delicious homemade pav with bhaji!
- The total time includes the resting time for the dough, during which it rises.
- Always use a good quality yeast for best results. Homemade Pav
title: “Homemade Pav " ShowToc: true date: “2024-11-02” author: “Ruby Swirsky”
Oct 12, 2015, Updated May 07, 2023
If you were to ask me to make a list of my most favorite dishes in the world, pav bhaji will definitely make it to the list. In fact chaat (common term used for Indian street food) and pav bhaji will be there among the top 3 for sure. For those who don’t know pav = bread/dinner roll and bhaji = mashed veggies with spices. This is an extremely popular dish all across India, yes the dish is originally from Mumbai and I have to say you do get world’s best pav bhaji in Mumbai but it is extremely popular all through the country. What makes pav bhaji so popular? I don’t know but as long as I can remember, I was always in love with it. Whenever we would eat in a restaurant, I would always check the menu to see if they had pav bhaji on it and if they did, then I knew what I was ordering. As the name suggests, there are 2 parts to pav bhaji .
- The Pav Bread , which is the bread that is served with the bhaji. Pav is almost like a dinner roll but made with few very simply ingredients. It’s actually what a common man in Mumbai eats almost everyday for breakfast. Pav is eaten with butter and also with vada (deep fried potato fritters). Vada pav is also extremely popular! This is also known as Ladi Pav.
- The Bhaji, which is mashed veggies. Potatoes, bell pepper, beans, tomato and onion are commonly used. All the veggies are boiled and then mashed and cooked with a special blend of spices. It is so good!
I make pav bhaji at home once in a while and initially when I made it here it never tasted as good as back home. I figured the reason was the pav, store bought dinner rolls/hamburger buns here are not the same as the pav we get in India. We get some pav at Indian grocery stores, but I don’t like them either. And so it all came down to making pav at home. Like I always say, if you really love something and want to eat it, you just need to learn how to make it. And I am so super excited to share this recipe with you guys. These homemade pav turned out fabulous! To make these homemade pav you only need flour, butter, milk powder, salt, sugar, water and yeast. These simple ingredients when combined together result in soft and delicious pav! You need to make this! Method In a bowl mix flour, milk powder and salt. Add melted butter to the flour and mix. Set aside. In a mug/bowl, take warm water, add sugar to it and then add the yeast. Give a quick stir and let the yeast activate for 5-10 minutes. This is called proofing of the yeast. You will know your yeast is proofed/active when it’s all bubbly and frothy on top. If your yeast doesn’t turn up the way it is in the picture, it is dead. Throw the water and start over again. Do not add this water to the flour, the yeast will not work and you will get hard pav buns.
Transfer the flour mix to the steel bowl of your stand mixer or you can do this with your hands. Add the activated yeast liquid to the flour. Knead the dough for 7-8 minutes using the dough hook attachment (or knead for 10-12 minutes using your hands). At this point I added additional 3 tablespoons of flour as I felt the dough was sticking a lot. You can do the same. Your dough is done when it looks smooth and springs back when you poke it. Transfer dough to a bowl and oil/butter it on top and on the sides as well. The bowl should also be coated with oil. Cover with a damp cloth and let the dough rise for 1 hour in a warm place or till it doubles in size. Once the dough has risen, transfer it to a floured working surface. Punch to release the air and let the dough rest for 10 minutes. Divide the dough into 13 equal parts. I used my kitchen scale to make sure they were all same size. Make round balls, smooth each ball and place in a 9 x 13 inch baking tray. Leave a little space between each dough ball as they will expand. Cover and keep the pan in a warm place for 30-45 minutes. The pavs will expand.
Bake at 400 F degrees for 12-14 minutes. Remove from oven and if you want, brush some melted butter on top as soon as they are out of the oven! Enjoy these delicious homemade pav with bhaji!
- The total time includes the resting time for the dough, during which it rises.
- Always use a good quality yeast for best results. Homemade Pav


