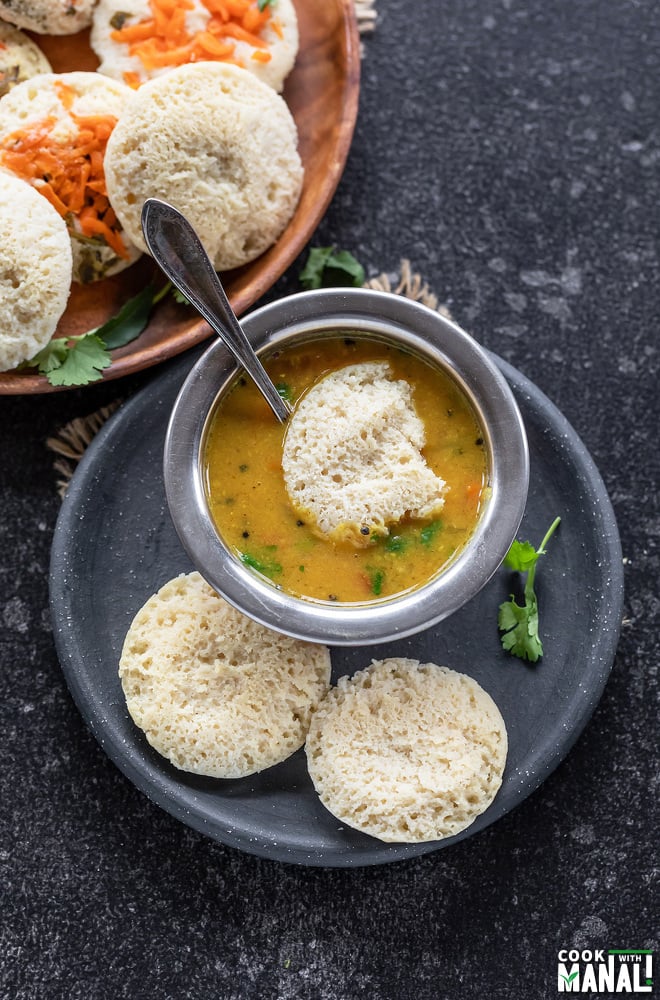
Jan 06, 2021 This idli is made with urad and moong dal only making it more protein packed than the regular idli.
Idlis are so comforting, aren’t they? I can pretty much have them everyday. I especially love them for breakfast or lunch. And because I love them so much I also make them often. Traditional idli is made with rice and dal and there’s nothing that beats a classic. But I do love to experiment with them like last year I shared with you guys Quinoa Idli and today I am sharing these Dal Idli. Dal=lentil so these idlis are made with lentils only. Very simple recipe which needs only 2 main ingredients, which are the two types of dals! If you are trying to avoid rice or just want to include more protein in your diet then these idlis are perfect for you.
These Dal Idlis
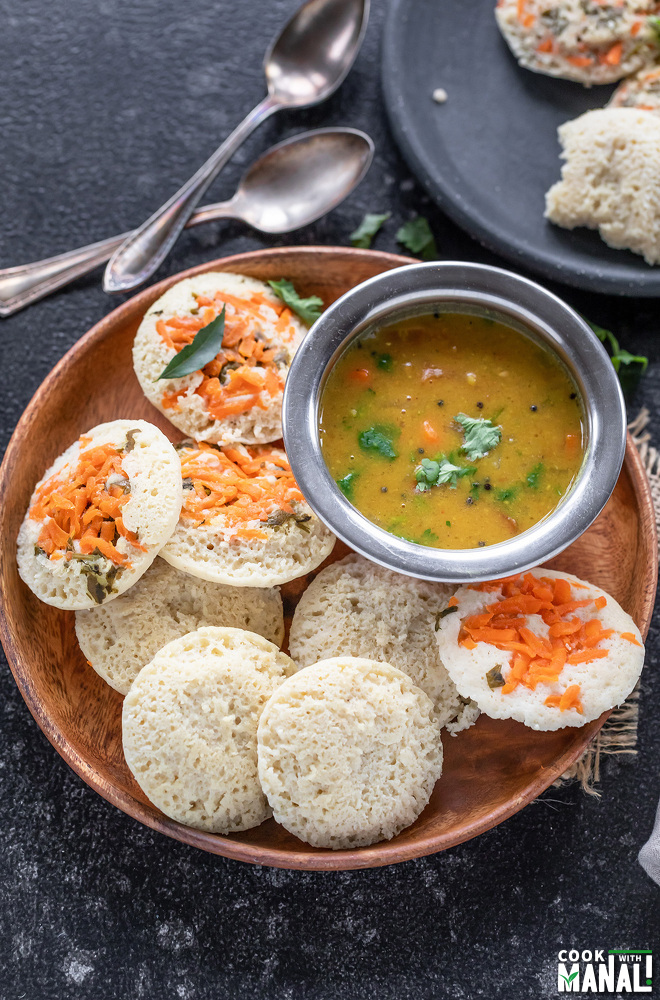
✔are made with 2 types of lentils only. ✔no rice! ✔are vegan and gluten-free. ✔make a protein rich breakfast/lunch option. These idlis were pretty light on the stomach, I had like 4 for lunch with sambar and didn’t feel as heavy as I do after eating 4 regular idlis. I steamed some as it is and to some I added carrots and chopped cilantro. If you want to add veggies, you can simply top the batter with them or you can also mix-in the veggies along with the batter and then steam. Honestly, we loved the plain idli more. But topping the idlis with veggies might be a good way to include some veggies in your diet. You can even add some chopped chilies for spice.
Ingredients
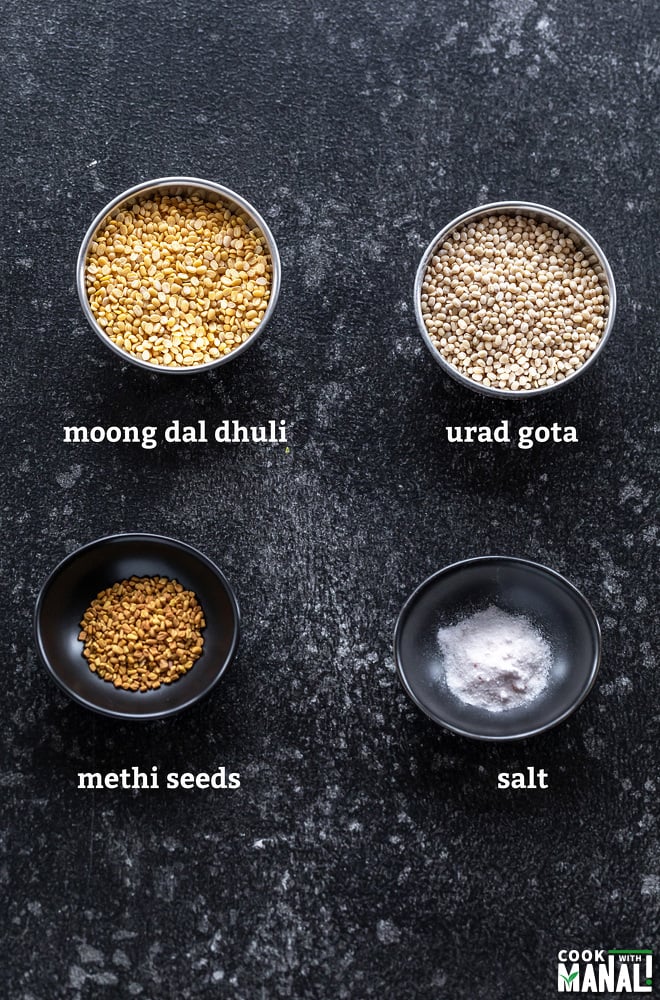
The main ingredients for this idli are the two types of lentils.
Urad dal gota (whole dehusked black gram): I always use urad gota for my idlis and dosa. In my personal experience, I have had better results when using gota rather than using split dhuli urad dal (dehusked urad dal). Moong dal dhuli (split & dehusked mung beans): this is the second lentil used in the recipe and this recipe uses twice the amount of moong dal compared to the urad dal. Methi seeds: whenever making idli or dosa batter, it’s a good idea to add some methi seeds (fenugreek seeds). They help in the fermentation process. Salt: you can use either rock salt (sendha namak) or regular salt will also work. Ideally rock salt is preferred since iodine in regular salt can interfere with the fermentation process but I have made this recipe using regular salt too and it worked just fine. These are the only 4 main ingredients in the recipe. The fifth is water and some veggies are optional. You can add them if you want while steaming the idlis but totally optional. Can I use any other dal? So this recipe has been tested with the mentioned lentils only. But you can use urad dal dhuli in place of gota, should work absolutely fine. Also for the moong, moong chilka and green sabut moong should also work. Can I make dosa with this batter? Yes, I have made dosa using the same batter. They don’t come out super crispy but you can make a good simple dosa with this batter. I don’t have an Instant Pot, so how do I ferment the batter? That’s no issue at all. I use the yogurt setting on Instant Pot because it gives me consistent results. You can just place the batter inside the oven (with oven lights on and oven off) overnight for the batter to ferment. Alternatively, if you live in a place where it’s very warm, you can simply leave the batter on the kitchen counter to ferment. Should I add salt in the beginning or later when the batter is fermented? I would say it depends on where you live. I live in a cold place so I add salt before fermentation as that helps in fermentation. If you live in a warm place, you can add salt to the batter before fermentation. How would I know the batter is fermented? Just drop some batter into a small bowl filled with water. If the batter floats, means it’s done. If it doesn’t float, it means it needs more time. How much time it takes for the batter to ferment? It depends on where you live. In cold places it might take 14 hours or even more during winters. In warm places, it might ferment in 5-6 hours only.
Method
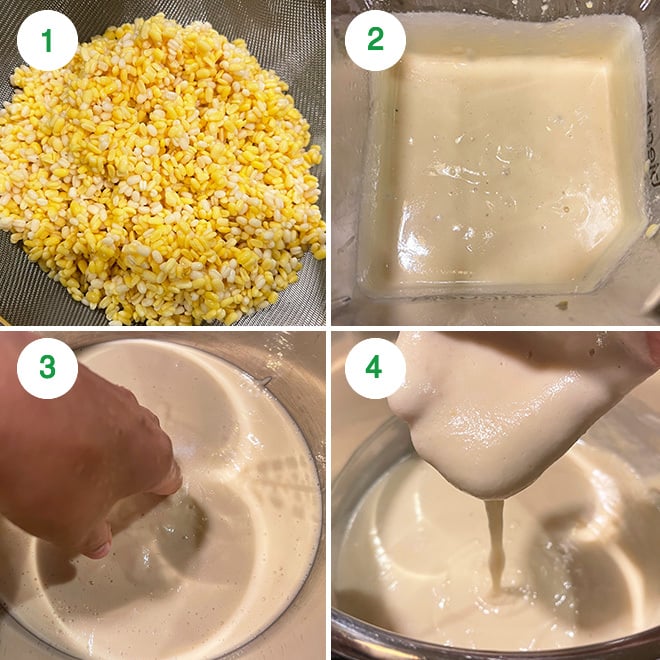
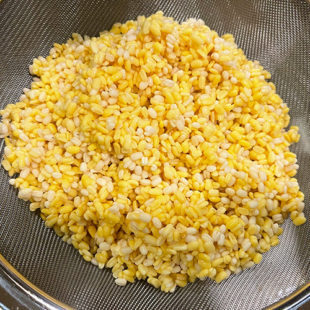
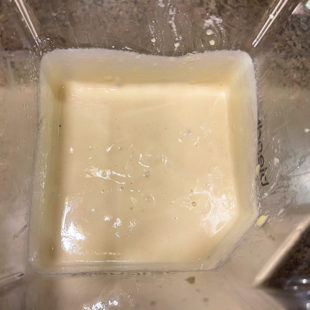
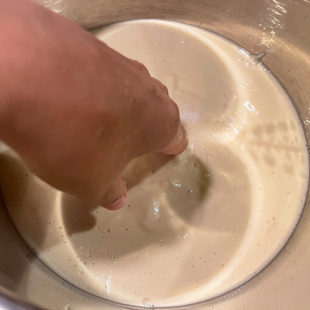
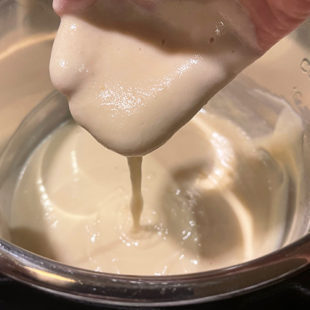
1- Start by soaking the two dals- moong dal dhuli and urad gota along with 1/2 teaspoon methi seeds for 5-6 hours in enough water (around 3 cups). After it has been soaked for 5 to 6 hours, drain the water using a strainer. 2- Now, transfer the soaked dal to a blender and add around 1 cup water. Blend to a smooth paste. You can use any blender you have, I use my Blendtec and run it on the soup mode for 30-40 seconds. 3- Transfer the blended dal to the steel pot of your Instant Pot. Add salt (especially if living in a colder place, skip if you live in a warm place) and then using your hands mix the batter nicely for 1-2 minutes. The mixing by hand also helps in fermentation. 4- The batter should have a nice pouring consistency. I added additional 3-4 tablespoons of water here to reach this consistency. Remember a thick batter will not ferment.
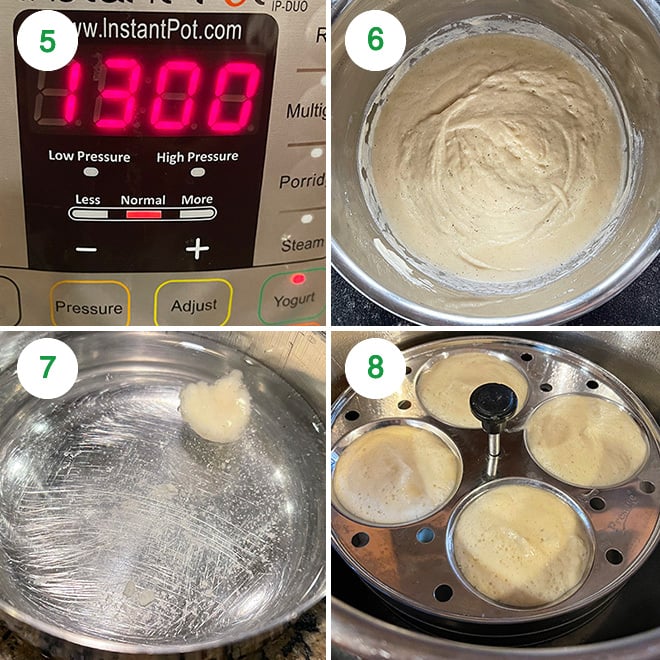
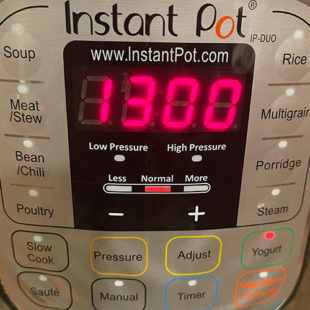
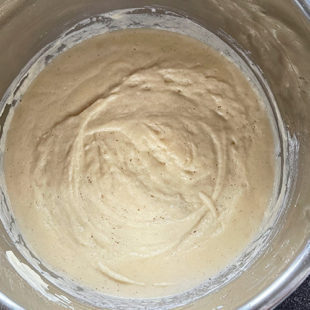
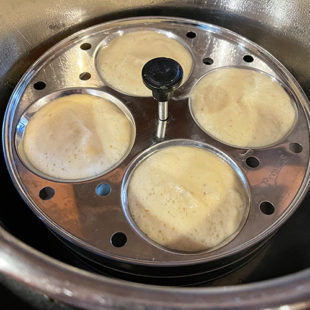
5- Cover the Instant Pot with a glass lid (not using the regular lid here in case batter over-ferments and then locks the lid) and press the yogurt button. I set it for 13 hours on yogurt mode “normal setting”. The fermentation time will depend on where you live. If you don’t have an IP, simply put the batter into the oven with lights on overnight. 6- After 13 hours, my batter was fermented as it was quite frothy and had bubbles on top. If your batter hasn’t fermented even after say 12-13 hours and it looks very thick, my advise would be to add some water make it nice pouring consistency and set it to ferment for additional 2 hours, it should ferment. 7- To check if the batter has fermented, you can always drop some batter into a bowl of water- if the batter floats, it means it’s aerated and fermented and you are good to make idlis. 8- You can either steam in a regular steamer for 10-12 minutes or use the IP. To steam in the Instant Pot- add 1.5 cups water to the steel pot of your Instant Pot and press saute while you fill the idli molds. Grease the idli molds with little oil and then fill then with the batter. The water in IP must be little simmering now. Press cancel button and place the idli stand inside the pot. Close the lid and press the steam button and select time to 13 minutes with the pressure valve in venting position. You will have to use an external timer of 13 minutes since the IP doesn’t count when the valve is in venting position. Once 13 minutes are up, unplug the IP and let the pressure valve drop down on it’s own. Then remove the idli stand from the pot and let it sit for 5-10 minutes and then remove the idlis from the mold.
Serve Dal Idli with sambar and chutney!
If you’ve tried Dal Idli Recipe then don’t forget to rate the recipe! You can also follow me on Facebook, Instagram to see what’s latest in my kitchen!
title: “Dal Idli No Rice " ShowToc: true date: “2024-09-04” author: “Mary Goins”
Jan 06, 2021 This idli is made with urad and moong dal only making it more protein packed than the regular idli.
Idlis are so comforting, aren’t they? I can pretty much have them everyday. I especially love them for breakfast or lunch. And because I love them so much I also make them often. Traditional idli is made with rice and dal and there’s nothing that beats a classic. But I do love to experiment with them like last year I shared with you guys Quinoa Idli and today I am sharing these Dal Idli. Dal=lentil so these idlis are made with lentils only. Very simple recipe which needs only 2 main ingredients, which are the two types of dals! If you are trying to avoid rice or just want to include more protein in your diet then these idlis are perfect for you.
These Dal Idlis
✔are made with 2 types of lentils only. ✔no rice! ✔are vegan and gluten-free. ✔make a protein rich breakfast/lunch option. These idlis were pretty light on the stomach, I had like 4 for lunch with sambar and didn’t feel as heavy as I do after eating 4 regular idlis. I steamed some as it is and to some I added carrots and chopped cilantro. If you want to add veggies, you can simply top the batter with them or you can also mix-in the veggies along with the batter and then steam. Honestly, we loved the plain idli more. But topping the idlis with veggies might be a good way to include some veggies in your diet. You can even add some chopped chilies for spice.
Ingredients
The main ingredients for this idli are the two types of lentils.
Urad dal gota (whole dehusked black gram): I always use urad gota for my idlis and dosa. In my personal experience, I have had better results when using gota rather than using split dhuli urad dal (dehusked urad dal). Moong dal dhuli (split & dehusked mung beans): this is the second lentil used in the recipe and this recipe uses twice the amount of moong dal compared to the urad dal. Methi seeds: whenever making idli or dosa batter, it’s a good idea to add some methi seeds (fenugreek seeds). They help in the fermentation process. Salt: you can use either rock salt (sendha namak) or regular salt will also work. Ideally rock salt is preferred since iodine in regular salt can interfere with the fermentation process but I have made this recipe using regular salt too and it worked just fine. These are the only 4 main ingredients in the recipe. The fifth is water and some veggies are optional. You can add them if you want while steaming the idlis but totally optional. Can I use any other dal? So this recipe has been tested with the mentioned lentils only. But you can use urad dal dhuli in place of gota, should work absolutely fine. Also for the moong, moong chilka and green sabut moong should also work. Can I make dosa with this batter? Yes, I have made dosa using the same batter. They don’t come out super crispy but you can make a good simple dosa with this batter. I don’t have an Instant Pot, so how do I ferment the batter? That’s no issue at all. I use the yogurt setting on Instant Pot because it gives me consistent results. You can just place the batter inside the oven (with oven lights on and oven off) overnight for the batter to ferment. Alternatively, if you live in a place where it’s very warm, you can simply leave the batter on the kitchen counter to ferment. Should I add salt in the beginning or later when the batter is fermented? I would say it depends on where you live. I live in a cold place so I add salt before fermentation as that helps in fermentation. If you live in a warm place, you can add salt to the batter before fermentation. How would I know the batter is fermented? Just drop some batter into a small bowl filled with water. If the batter floats, means it’s done. If it doesn’t float, it means it needs more time. How much time it takes for the batter to ferment? It depends on where you live. In cold places it might take 14 hours or even more during winters. In warm places, it might ferment in 5-6 hours only.
Method
1- Start by soaking the two dals- moong dal dhuli and urad gota along with 1/2 teaspoon methi seeds for 5-6 hours in enough water (around 3 cups). After it has been soaked for 5 to 6 hours, drain the water using a strainer. 2- Now, transfer the soaked dal to a blender and add around 1 cup water. Blend to a smooth paste. You can use any blender you have, I use my Blendtec and run it on the soup mode for 30-40 seconds. 3- Transfer the blended dal to the steel pot of your Instant Pot. Add salt (especially if living in a colder place, skip if you live in a warm place) and then using your hands mix the batter nicely for 1-2 minutes. The mixing by hand also helps in fermentation. 4- The batter should have a nice pouring consistency. I added additional 3-4 tablespoons of water here to reach this consistency. Remember a thick batter will not ferment.
5- Cover the Instant Pot with a glass lid (not using the regular lid here in case batter over-ferments and then locks the lid) and press the yogurt button. I set it for 13 hours on yogurt mode “normal setting”. The fermentation time will depend on where you live. If you don’t have an IP, simply put the batter into the oven with lights on overnight. 6- After 13 hours, my batter was fermented as it was quite frothy and had bubbles on top. If your batter hasn’t fermented even after say 12-13 hours and it looks very thick, my advise would be to add some water make it nice pouring consistency and set it to ferment for additional 2 hours, it should ferment. 7- To check if the batter has fermented, you can always drop some batter into a bowl of water- if the batter floats, it means it’s aerated and fermented and you are good to make idlis. 8- You can either steam in a regular steamer for 10-12 minutes or use the IP. To steam in the Instant Pot- add 1.5 cups water to the steel pot of your Instant Pot and press saute while you fill the idli molds. Grease the idli molds with little oil and then fill then with the batter. The water in IP must be little simmering now. Press cancel button and place the idli stand inside the pot. Close the lid and press the steam button and select time to 13 minutes with the pressure valve in venting position. You will have to use an external timer of 13 minutes since the IP doesn’t count when the valve is in venting position. Once 13 minutes are up, unplug the IP and let the pressure valve drop down on it’s own. Then remove the idli stand from the pot and let it sit for 5-10 minutes and then remove the idlis from the mold.
Serve Dal Idli with sambar and chutney!
If you’ve tried Dal Idli Recipe then don’t forget to rate the recipe! You can also follow me on Facebook, Instagram to see what’s latest in my kitchen!


