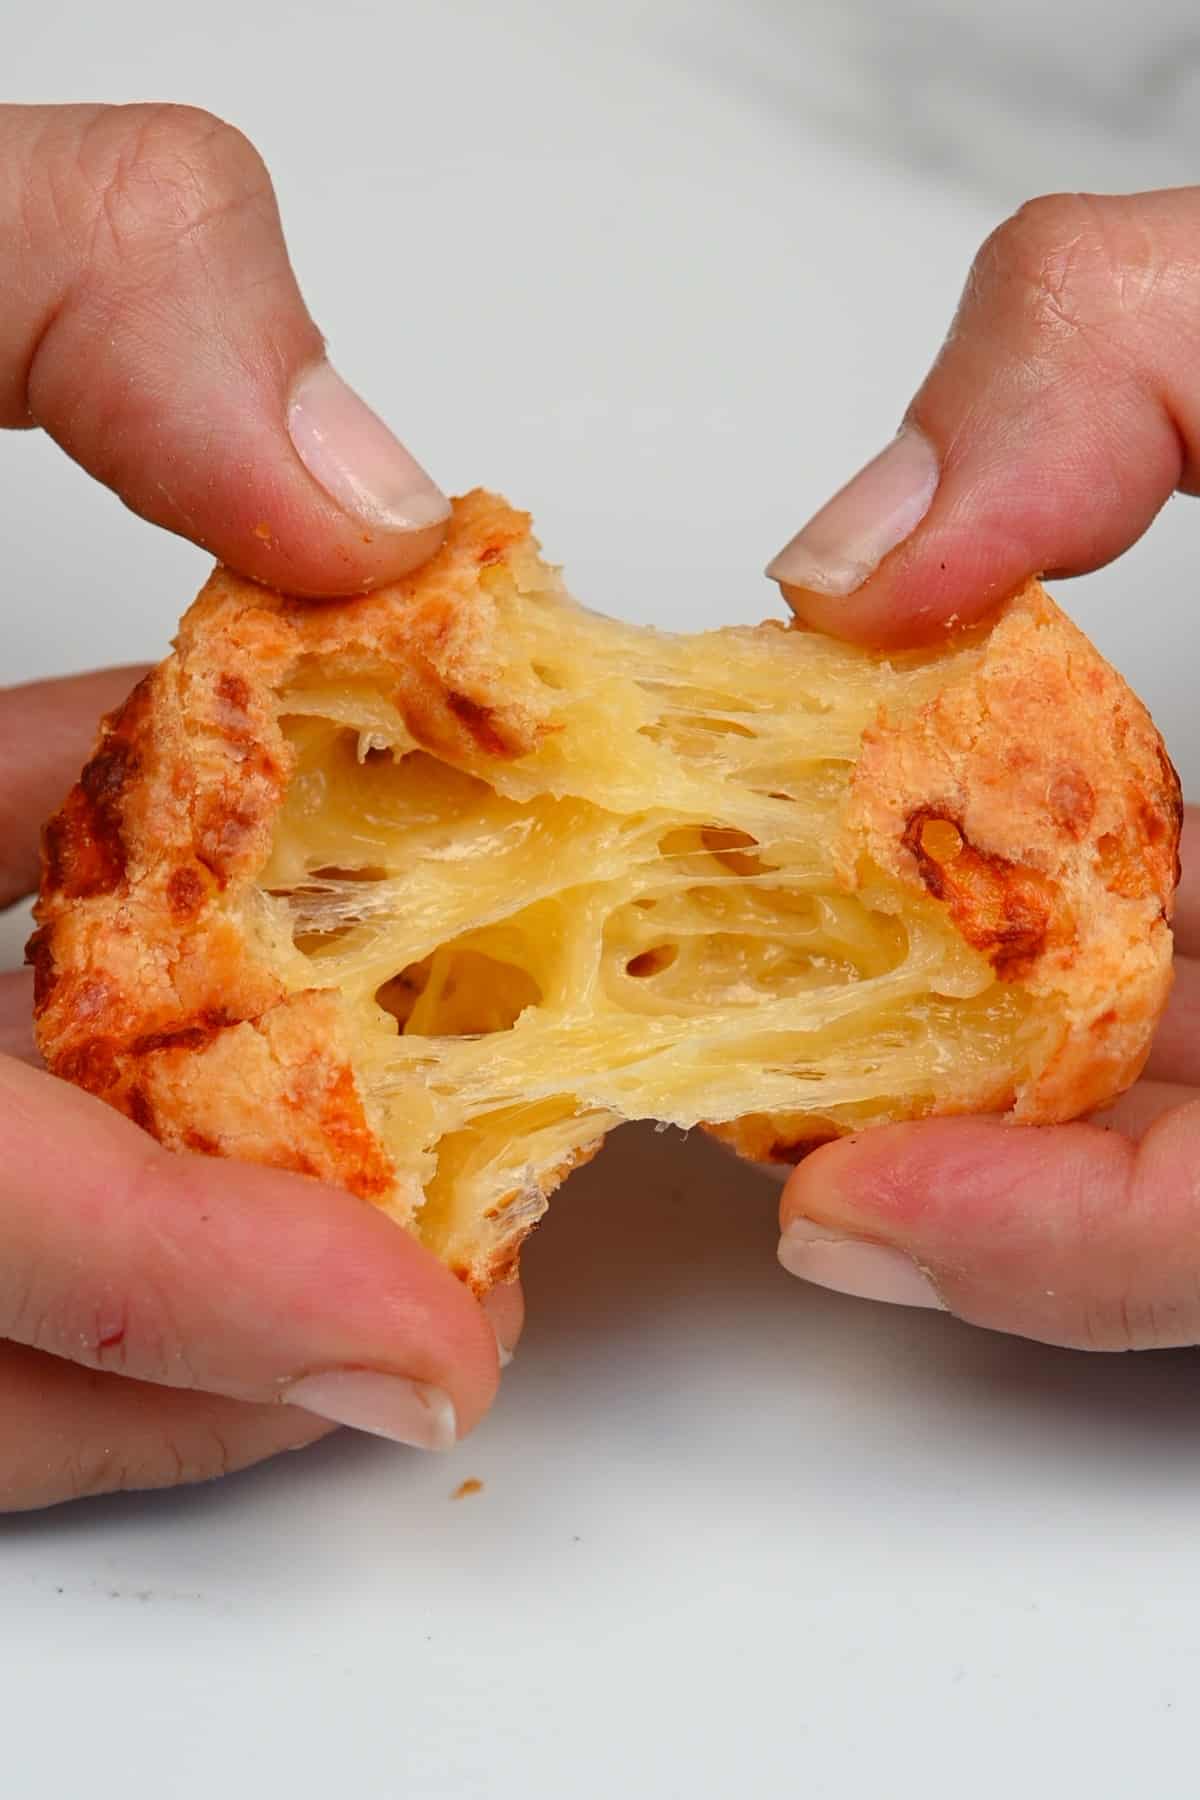
So far this year (and last year too, come to think of it), I jumped head-first into the world of baking. After sharing recipes for American NY-style bagels and soft pretzels, Turkish Ramadan pide and simit, Greek pita, Middle Eastern cheese manakish, now it’s the turn of Pão de Queijo aka Brazilian cheese bread. The funny thing is this isn’t actually bread at all – there’s no flour, water, or yeast. Instead, these Brazilian cheese balls rely on cassava starch for cheese puffs that are slightly crisp outside with a chewy, cheesy center. Unlike yeast-leavened breads, these naturally gluten-free, starchy cheese rolls puff up due to the air trapped within the elastic starch dough expanding during the baking process. Once baked, the paõ de queijo makes for a great breakfast item or snack alongside a big mug of coffee (or maybe this dalgona latte?). Check out my how-to serve section for tons of ideas. Best of all, you can make a massive batch and freeze them to bake later!
What is pão de queijo?
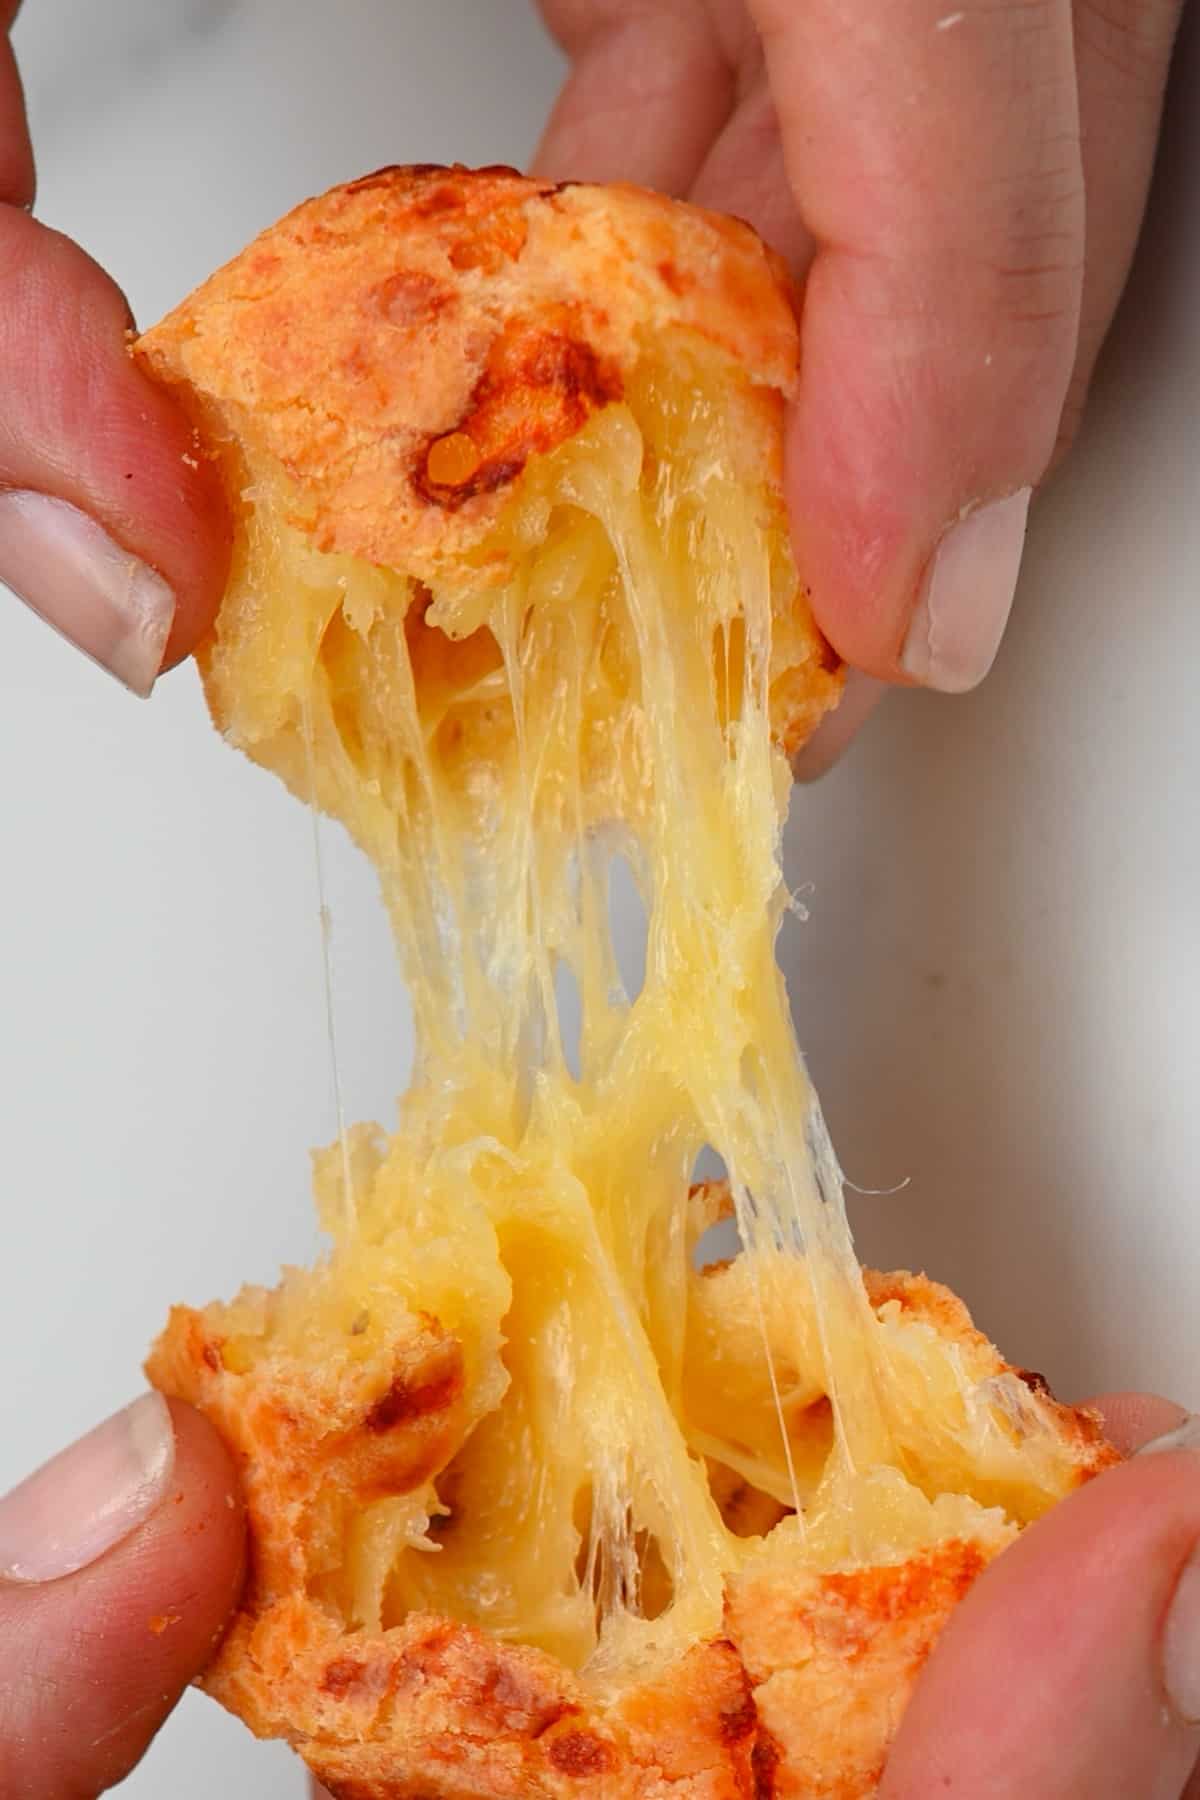
Pão de queijo (‘cheese bread’ in Portuguese) is described as Brazilian cheese bread. Shaped like a small ball/roll, these aren’t technically bread at all. Instead, pão de queijo is more accurately described as a starch cookie. It combines cassava flour with cheese as its base ingredients. The result is these small Brazilian cheese puffs that have a crisp outer shell with a melty inner cheese center. They’re perfect for enjoying with breakfast or as a snack. It’s said that originally these cassava starch rolls were made minus the cheese and were eaten by enslaved Portuguese colonists. Now they are sold by street vendors across northern Argentina, and Brazil, often sold in supermarkets and bakeries. While they are traditionally made with Minas cheese, there are several variations, including mozzarella and parmesan fillings. There are several similar recipes across the globe, including Gougère in France, pandebono in Ecuador and Colombia, cuñapes in Bolivia, and Chipa in Paraguay. Unfortunately, there’s no such thing in the UK, so I couldn’t wait to try this recipe!
The Ingredients
Optional add-ins
There are several ‘untraditional’ ways that you can adapt this Brazilian cheese bites recipe. Here are a few suggestions.
Seasonings: like any cheese bread, these will be delicious with additional herbs and seasonings. Perhaps Italian seasoning, rosemary, or a garlic powder and herb mixture. For spice: add some dried chili flakes for pops of heat throughout the Brazilian cheese bread rolls.
Let me know what else you’d add!
How to Make Brazilian Cheese Bread (Pão de queijo)
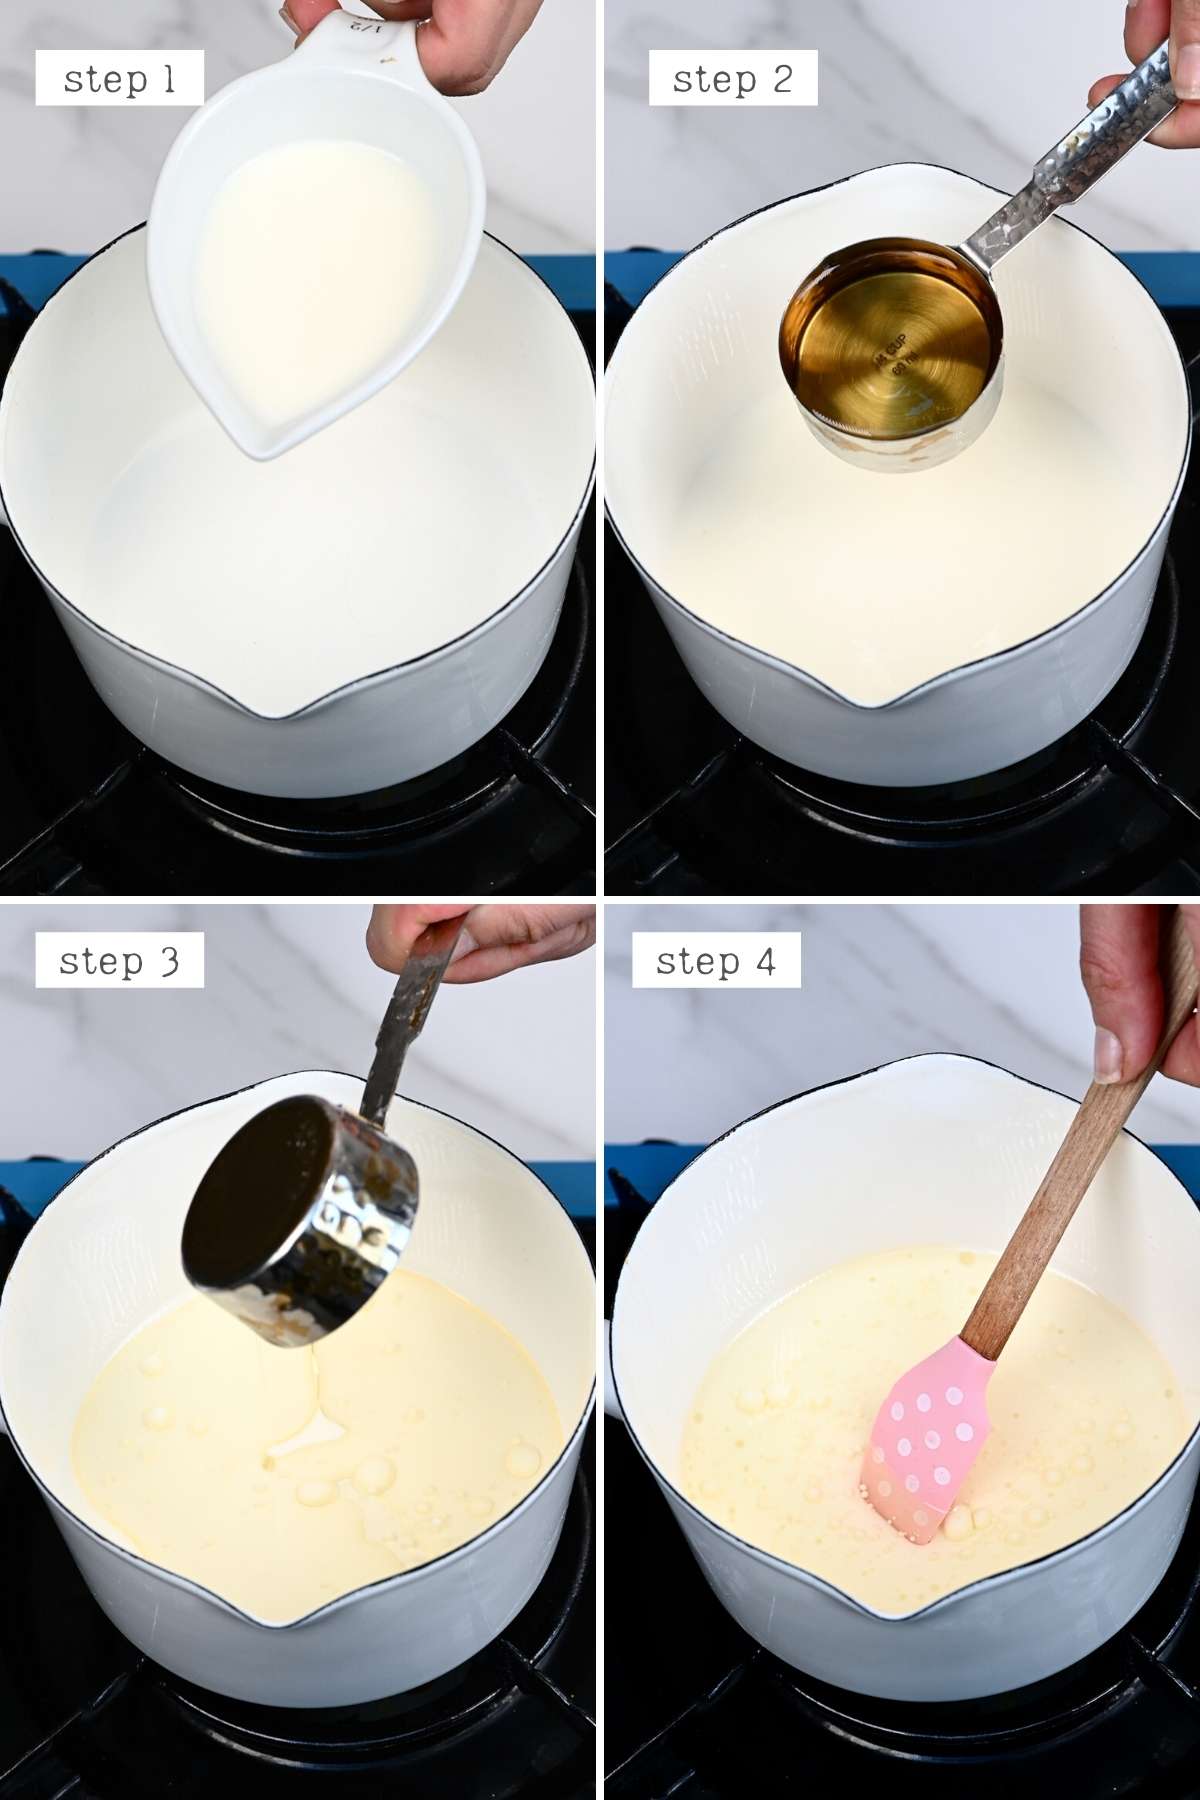
Step 1: Heat the milk fat mixture
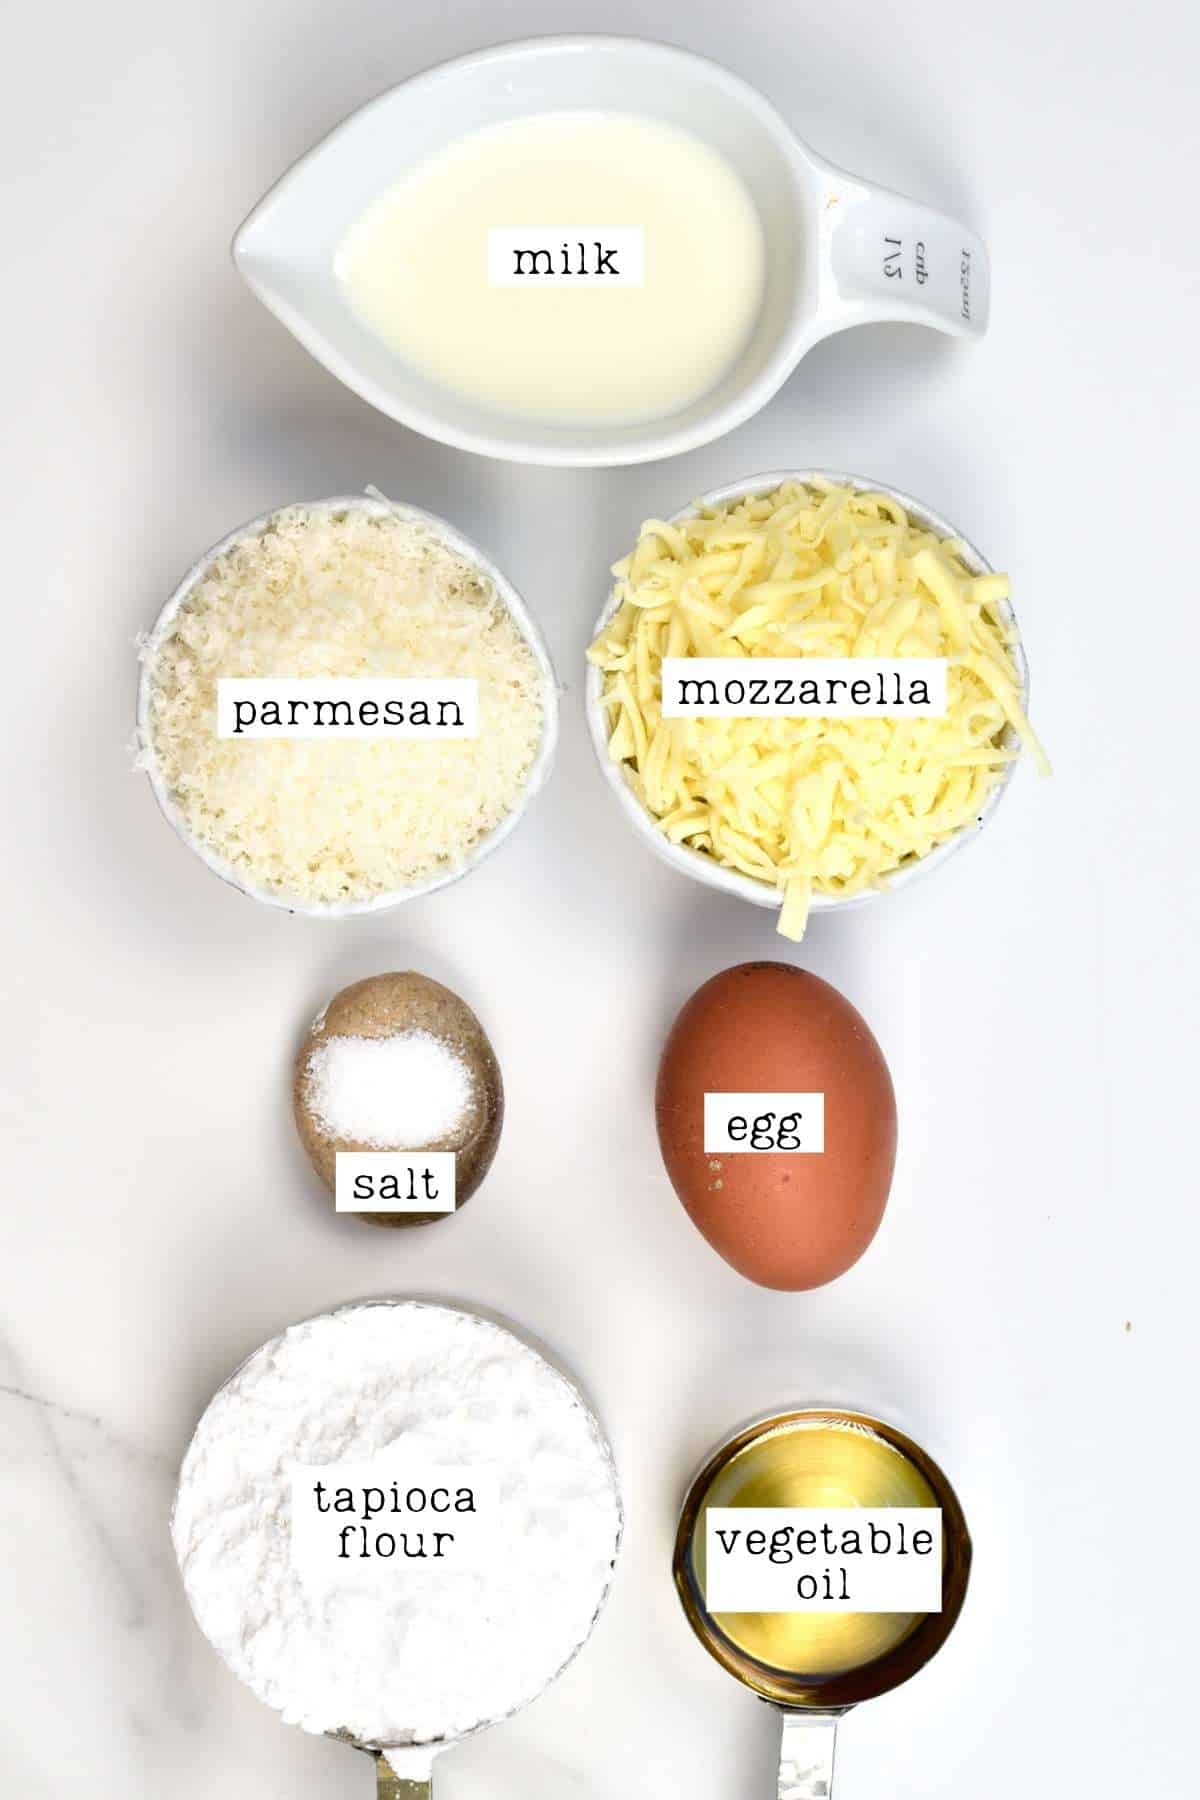
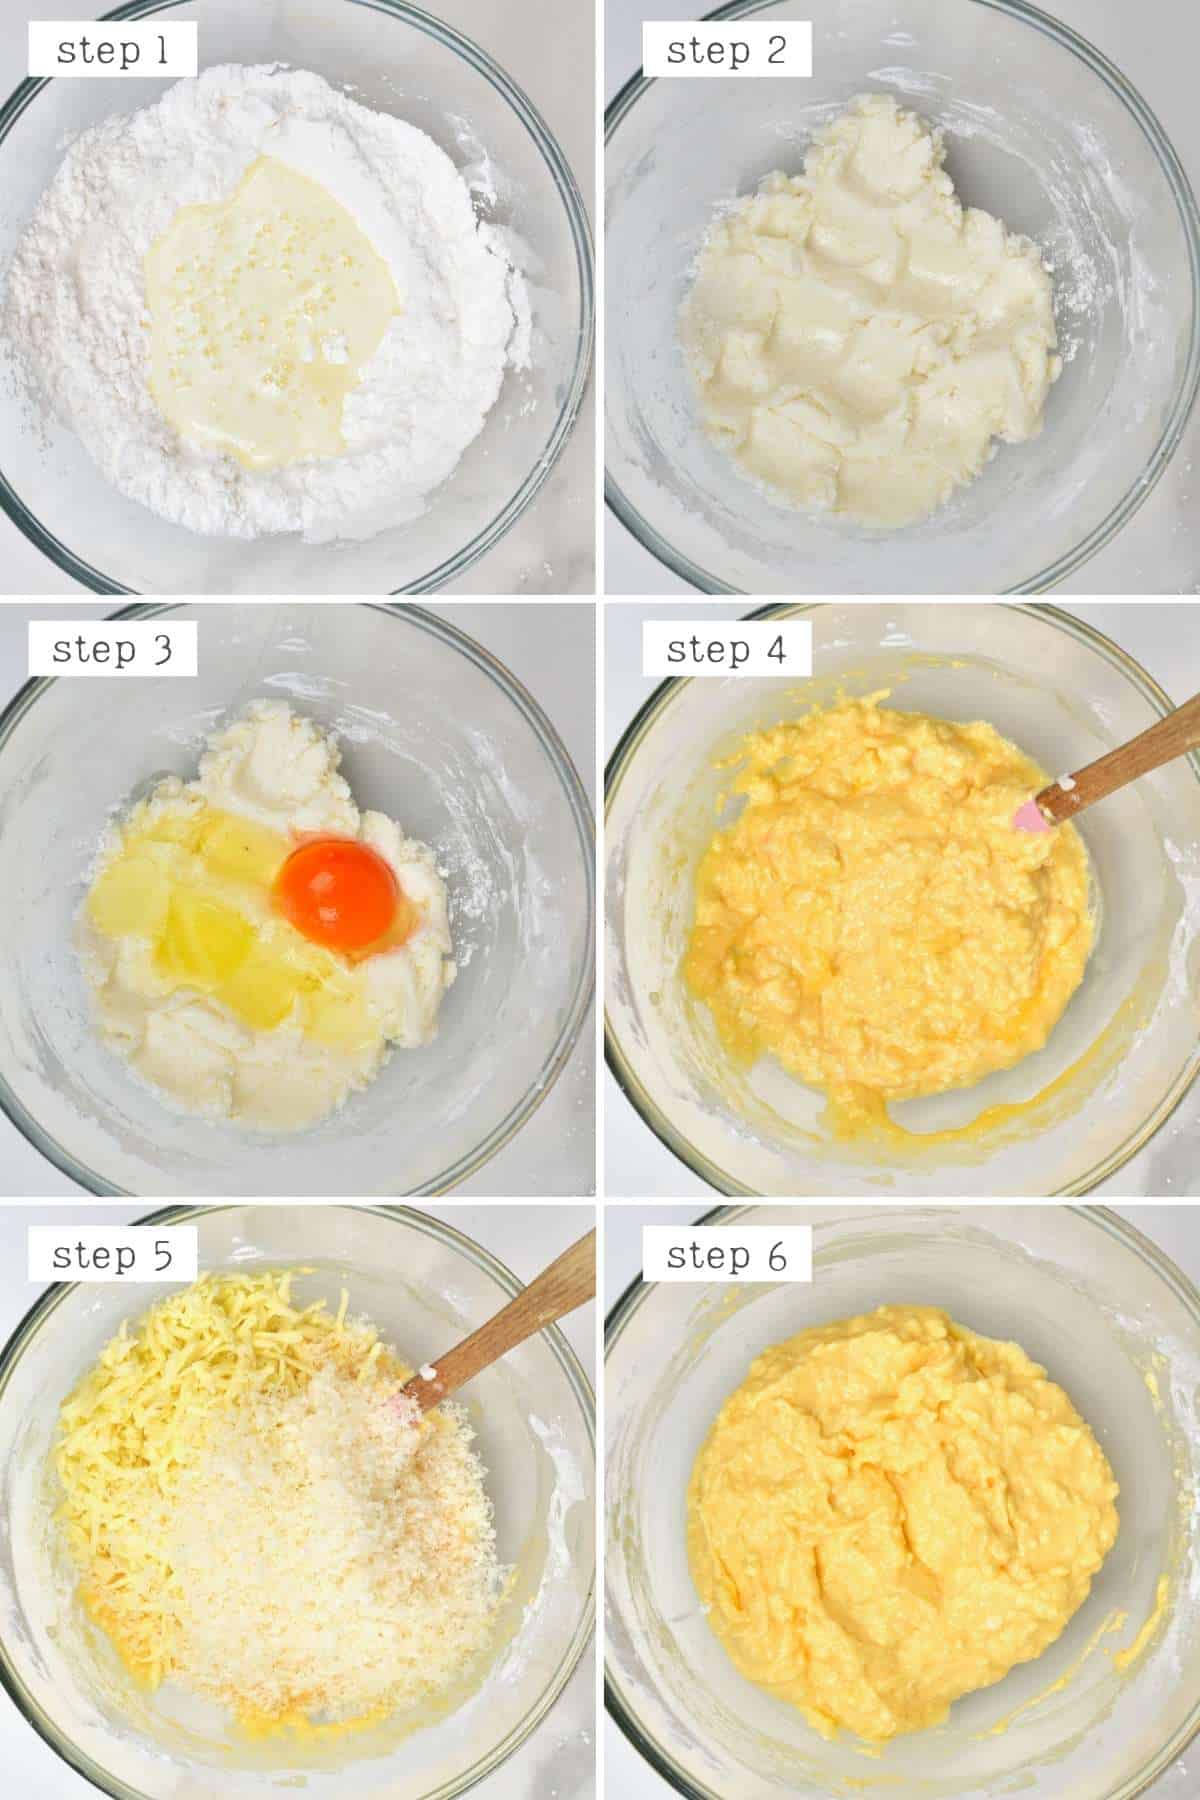
Add the milk and vegetable oil (or butter) to a small pan. Heat over medium-high heat until it comes to a boil. Meanwhile, as it heats up, add the starch and salt to a large bowl (or blender).
Step 2: Prepare the dough
Add the warmed milk mixture to the bowl with the tapioca starch. Mix it well into a sticky dough – almost like a fondant texture. If the mixture is very hot, it can be a good idea to cool it for several minutes. Otherwise, you run the risk of your egg starting to cook and the cheese melting – whoops! Then add the egg and incorporate it well before adding the cheese and folding it into the batter. Traditionally the mixture is added to a blender to properly incorporate the oil (or butter) into the batter. Still, I’ve found that it works fine blending it by hand using my method. To use a blender/stand mixer: For a blender, you just add the starch and milk mixture, blend, add in the egg and cheese, and blend into a batter. For a stand mixer, slowly pour in the milk mixture while mixing it on a low. Then mix in the egg and cheese and increase the mixer speed to medium speed to form the batter.
Step 3: Bake the Brazilian cheese bread
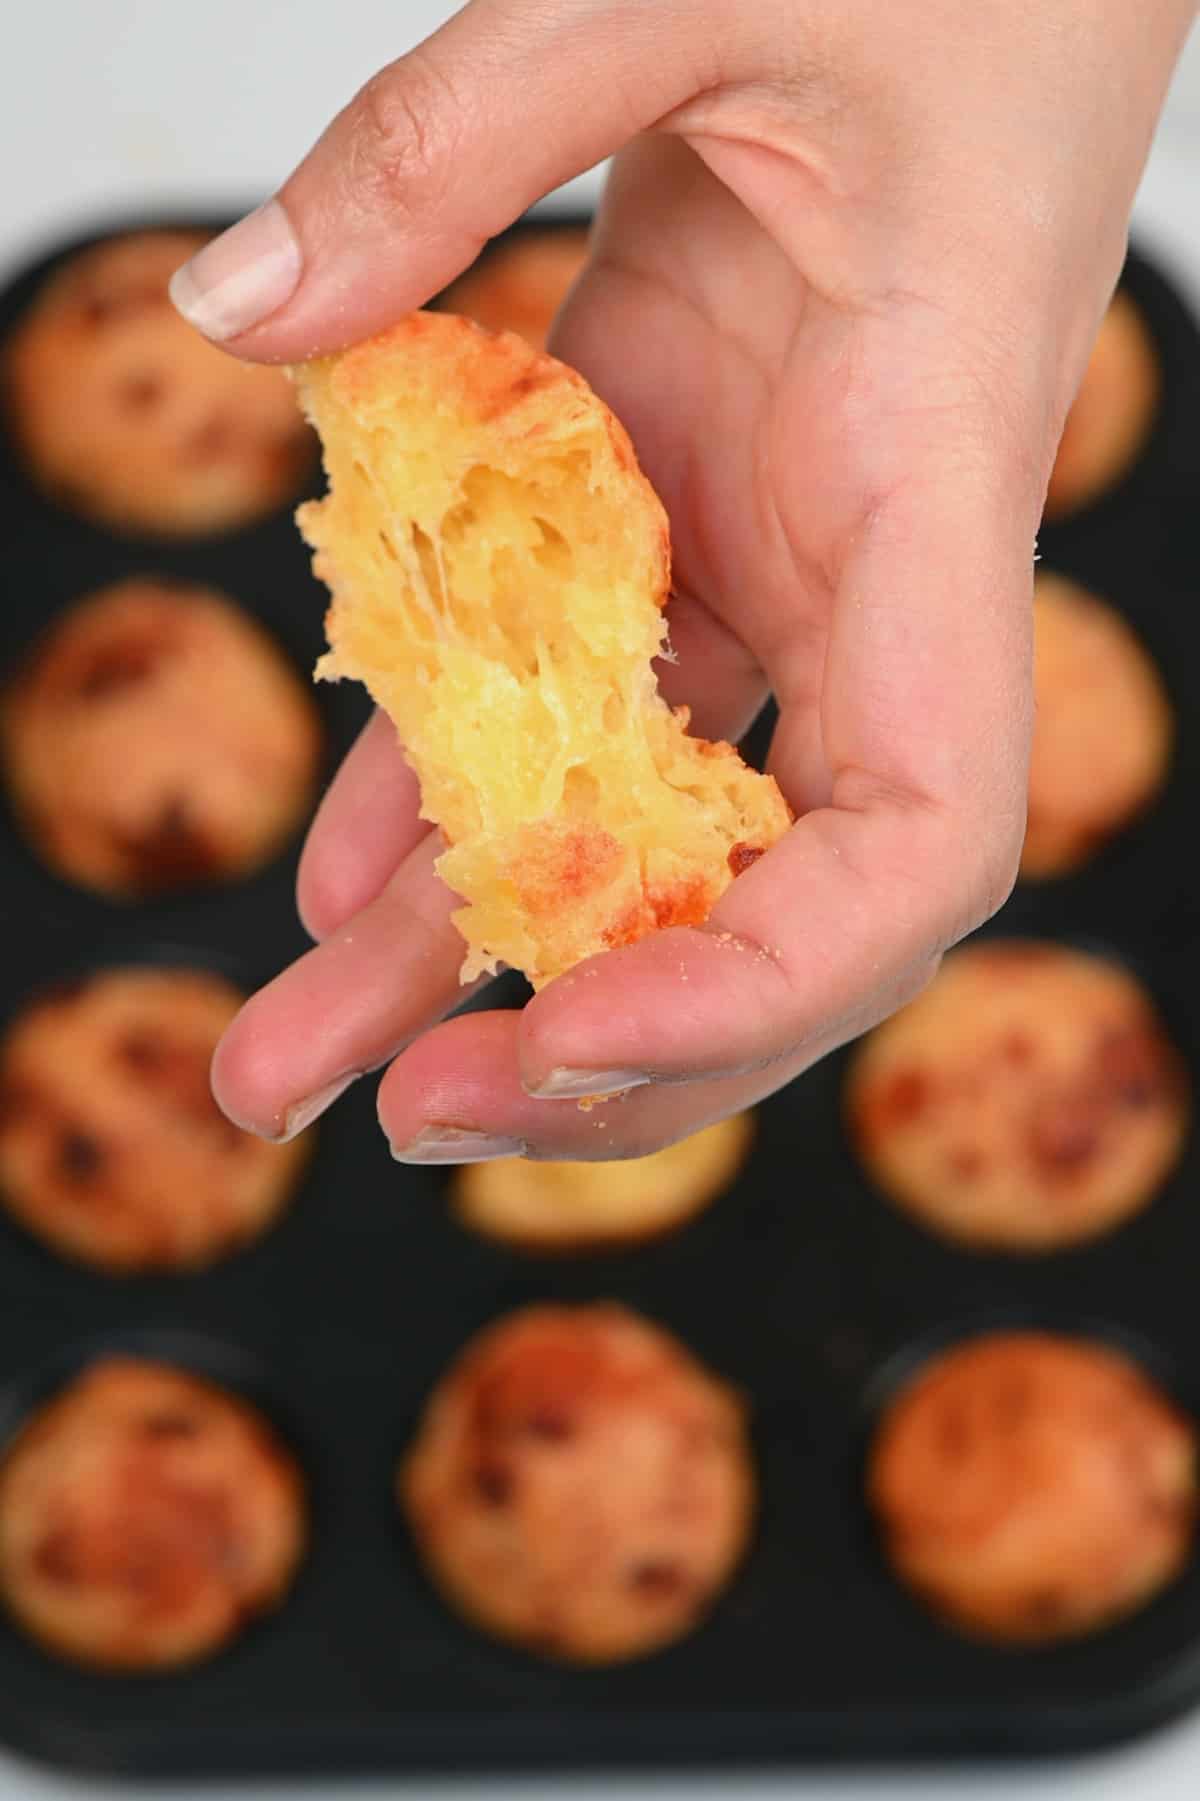
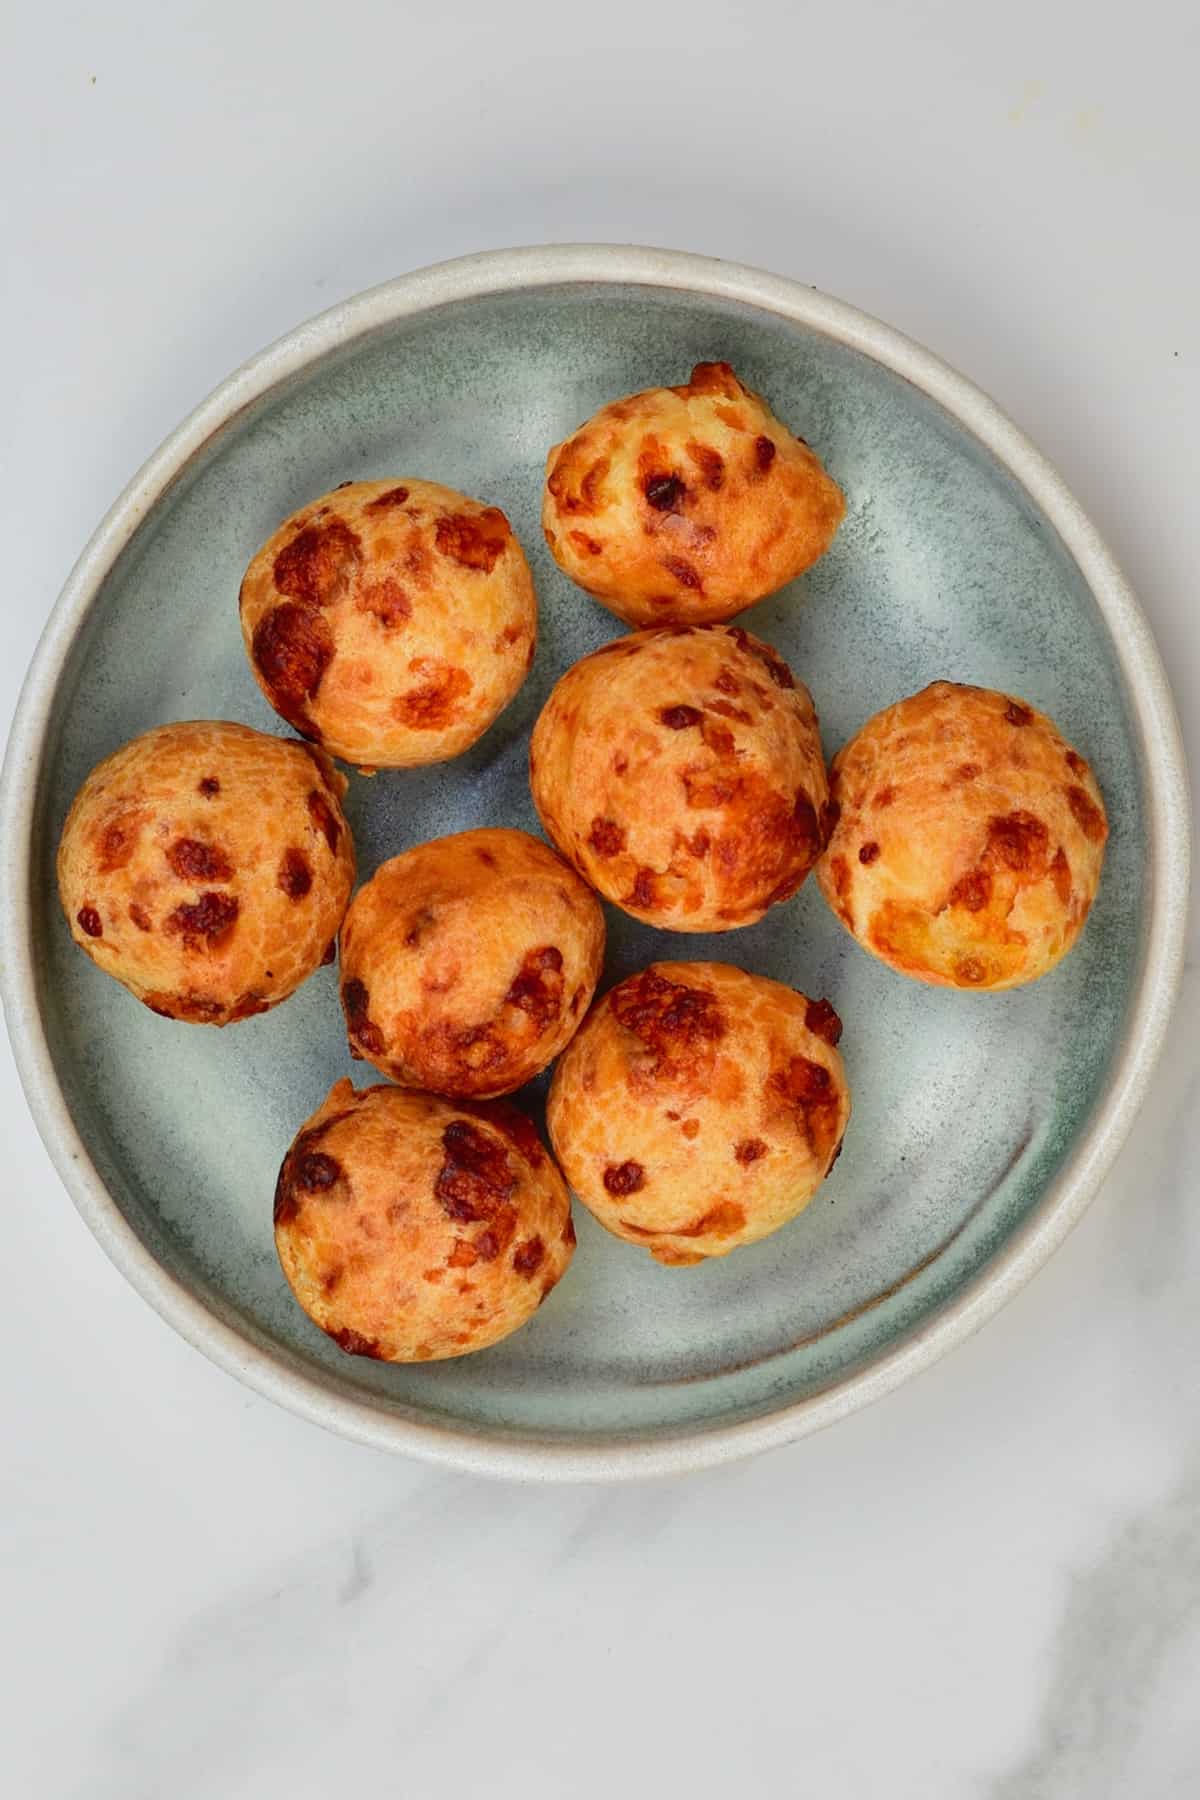
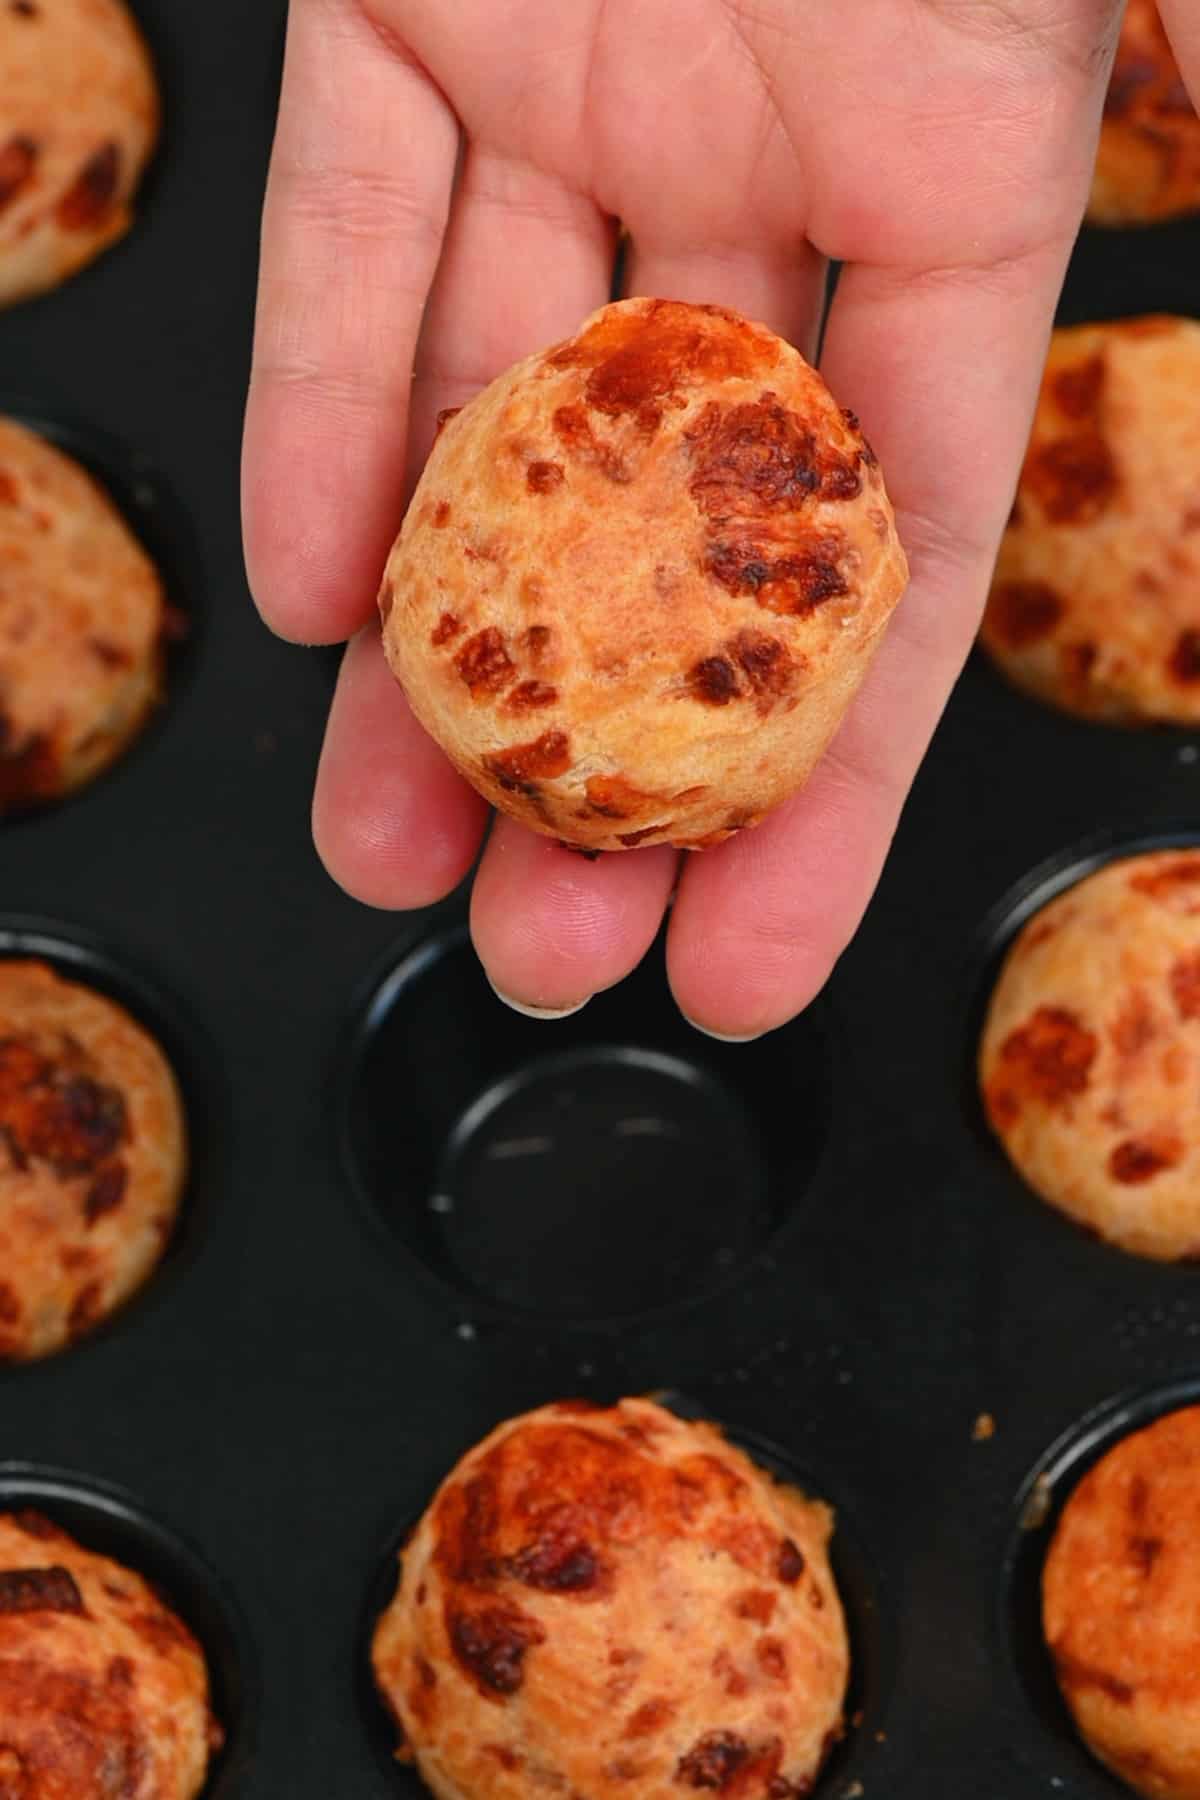
Preheat the oven to 400ºF/200ºC. If the batter is hand moldable, then you can hand mold each ball. Otherwise, use a 1 Tbsp measuring spoon/scoop per pão de queijo. Spoon the mixture into a well-oiled (or use cooking spray) mini muffin pan or onto a parchment-lined baking tray (1 inch apart). I prefer using the muffin tin as it works well with a slightly looser batter too! Optionally, you can sprinkle a little extra cheese over them – but it’s not necessary. Bake for between 15-20 minutes (the time will vary based on your oven and if you’re using a muffin tin vs. oven tray). Once ready, the Brazilian cheese bread should be lightly brown and puffed up. Mine are slightly browner than usual this time because I got distracted (whoops!). If you bake them until very lightly golden, then they will be chewier and more elastic. If you bake them until a darker brown, like mine, then they’ll be crisper on the outside. Once baked, they are ready to enjoy immediately or be allowed to cool for later.
How to Make Ahead and Store?
Room Temp: you can store the thoroughly cooled pão de queijo at room temperature for 2-3 days. Enjoy as is or reheat (instructions below). Fridge: the Brazilian cheese bread rolls can be stored in an airtight container for up to a week in the refrigerator. Freezer: I usually freeze the unbaked versions rather than the baked ones (the frozen Brazilian cheese bread can be baked from frozen), so I don’t know how the texture may be impacted by freezing the baked cheese bread. Reheat: to reheat the Brazilian cheese bread, just place them back in the oven until warmed through.
How to Serve Pão De Queijo
When I took to my Instagram stories the other day and asked how people enjoy serving these Brazilian cheese bread rolls, I received literally hundreds of replies and won’t run out of ideas for … ever! But I thought the ideas could help to inspire others, too:
As a snack alongside coffee (black coffee or café con Leche), hot cocoa, or even juice like orange juice, Serve with a bowl of creamy tomato soup, Alongside scrambled eggs or scrambled tofu with veggies, With a bean and brown rice dish, Alongside a bowl of fruit, As a side with a leafy salad.
The pão de queijo can also be cut open and ‘stuffed’/topped with all sorts of toppings, including:
Jam – particularly guava jam (goiabada), Cream cheese (like requeijão cheese) or harder cheese, Sweet spreads like homemade Nutella or Dulce de leche (dolce de leite), With sliced tomato, cucumber, and/or avocado.
Let me know in the comments how you plan to (or did) enjoy these Brazilian cheese bread.
Recipe Notes & Variations
Experiment with the cheese: I think half the fun of these pão de queijo is being able to experiment with different cheese and cheese blends to find your perfect option. I like to combine a hard cheese like parmesan with softer options like mozzarella, Monterey Jack, pepper jack, etc. If you only use one or the other, it will either be too gummy or too dry (but I don’t know for sure). Don’t open the oven too early: this is one of those recipes that can lead to disaster (aka no puffing up) if you open the oven door before they’re ready. The texture: for those who haven’t tried this Brazilian cheese bread before, it’s important to note that these are meant to be quite dense and chewy; that’s not a mistake. For larger pão de queijo: if you want to make larger Brazilian cheese puffs, I recommend using a small ice-cream scoop (usually around 2 Tbsp) per ball and placing them 2-inches apart on the baking tray (or use a large muffin pan). It’s best to dip the scoop in water between scoops if the batter is very sticky. If you don’t have or use sour tapioca starch: you can optionally add a few drops of lemon juice or vinegar to reproduce the slightly tart flavor. The tapioca starch: In Brazil, the cassava starch (aka manioc starch) is ‘Polvilho’, and there is the sweet (doce) and sour (azedo).
Other Bread Recipes
Sourdough Cheesy Pull-Apart Bread (‘Crack’ Bread) How To Make Soft Pretzels Grilled Cheese Sandwich Easy No-Knead Turkish Bread (Ramadan Pide Bread) Christmas Tree Pull-Apart Bread (Cheese Buns) Easy Cheese Flatbread (Cheese Manakish) 2-Ingredient Sweet Potato Flatbread (Gluten-free)
You might also like some of these 25+ breakfast ideas from around the world! If you try this Brazilian cheese bread recipe, I’d love to hear your thoughts/questions below. Also, I’d really appreciate a recipe card rating below, and feel free to tag me in your recipe recreations on Instagram @Alphafoodie!